
A high-quality PSD mockup is the cornerstone of any successful digital product listing. It not only allows you to present your design in a realistic setting but also makes it easier to swap out graphics for different products or color variations. In this section, we’ll break down the process of creating a professional mockup from scratch using Photoshop.
Step 1: Gather Your Essential Assets
Before diving into Photoshop, make sure you have the following two key components ready:
- Mockup Photo: A high-resolution image of the product you want to showcase (e.g., a t-shirt, mug, or poster). Check out our product catalog to view the list of supported products.

- Design Placeholder (Input File): A file that will serve as the design template. For example, in our tutorial, we use an input file sized at 4200 x 4800 pixels (such as the Bella 3001 input file).
Step 2: Set Up Your Canvas
Creating a new file with the correct aspect ratio is critical for ensuring your design fits perfectly. Follow these steps:
- Open Photoshop: Launch the application on your computer.
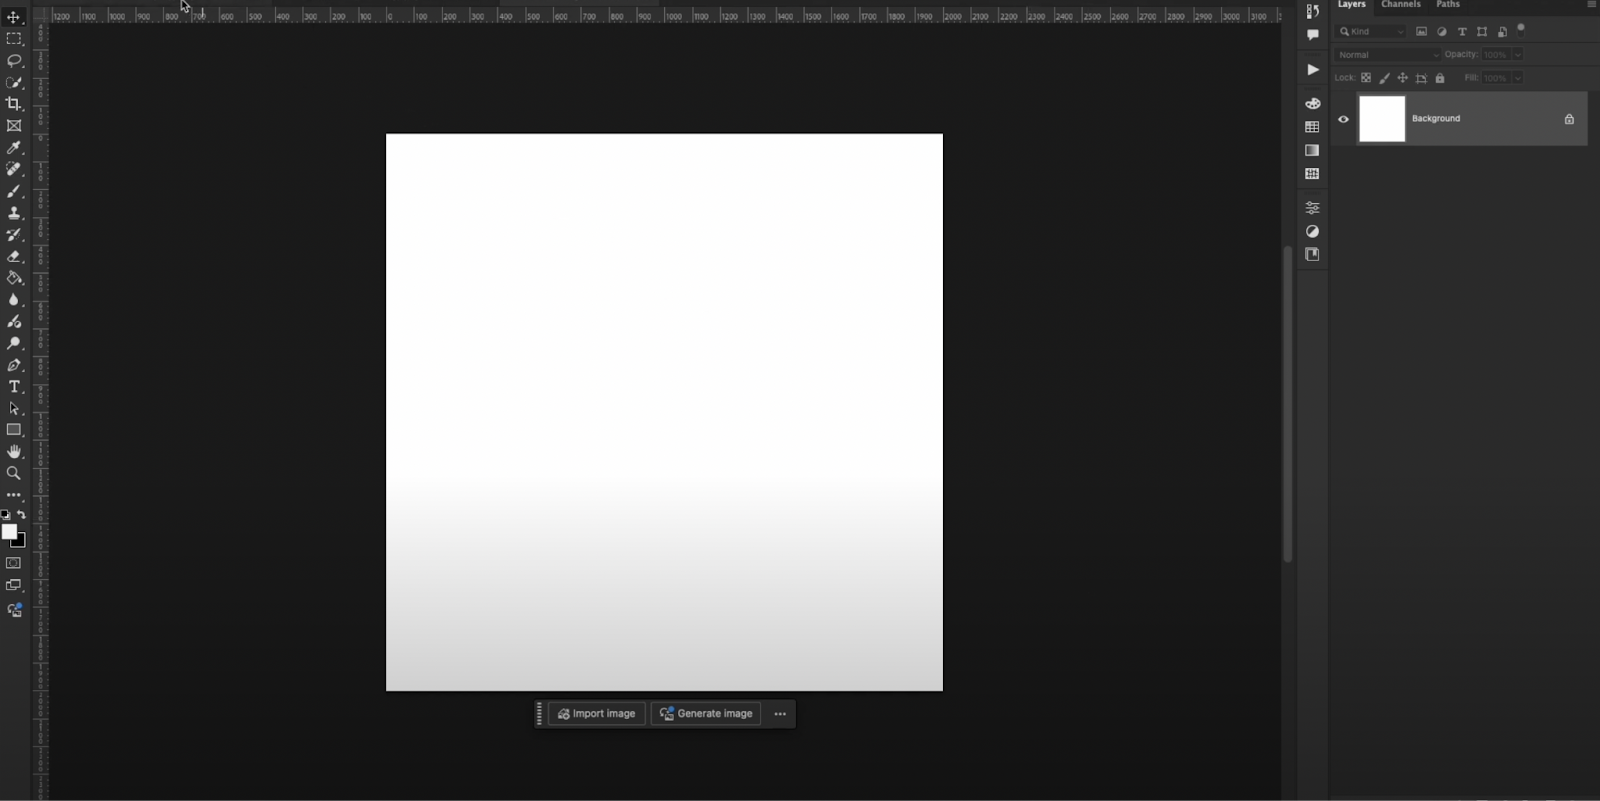
- Create a New Document:
- On Mac: Press Command + N
- On Windows: Press Control + N
- Select 2000 x 2000 Pixels: Use the preset that is optimized for PSD mockups—typically set at 2000 x 2000 pixels. This ensures consistency and compatibility with MyDesigns’ bulk listing tools.
Step 3: Import Your Assets and Arrange Layers
With your canvas set, it’s time to bring in your assets:
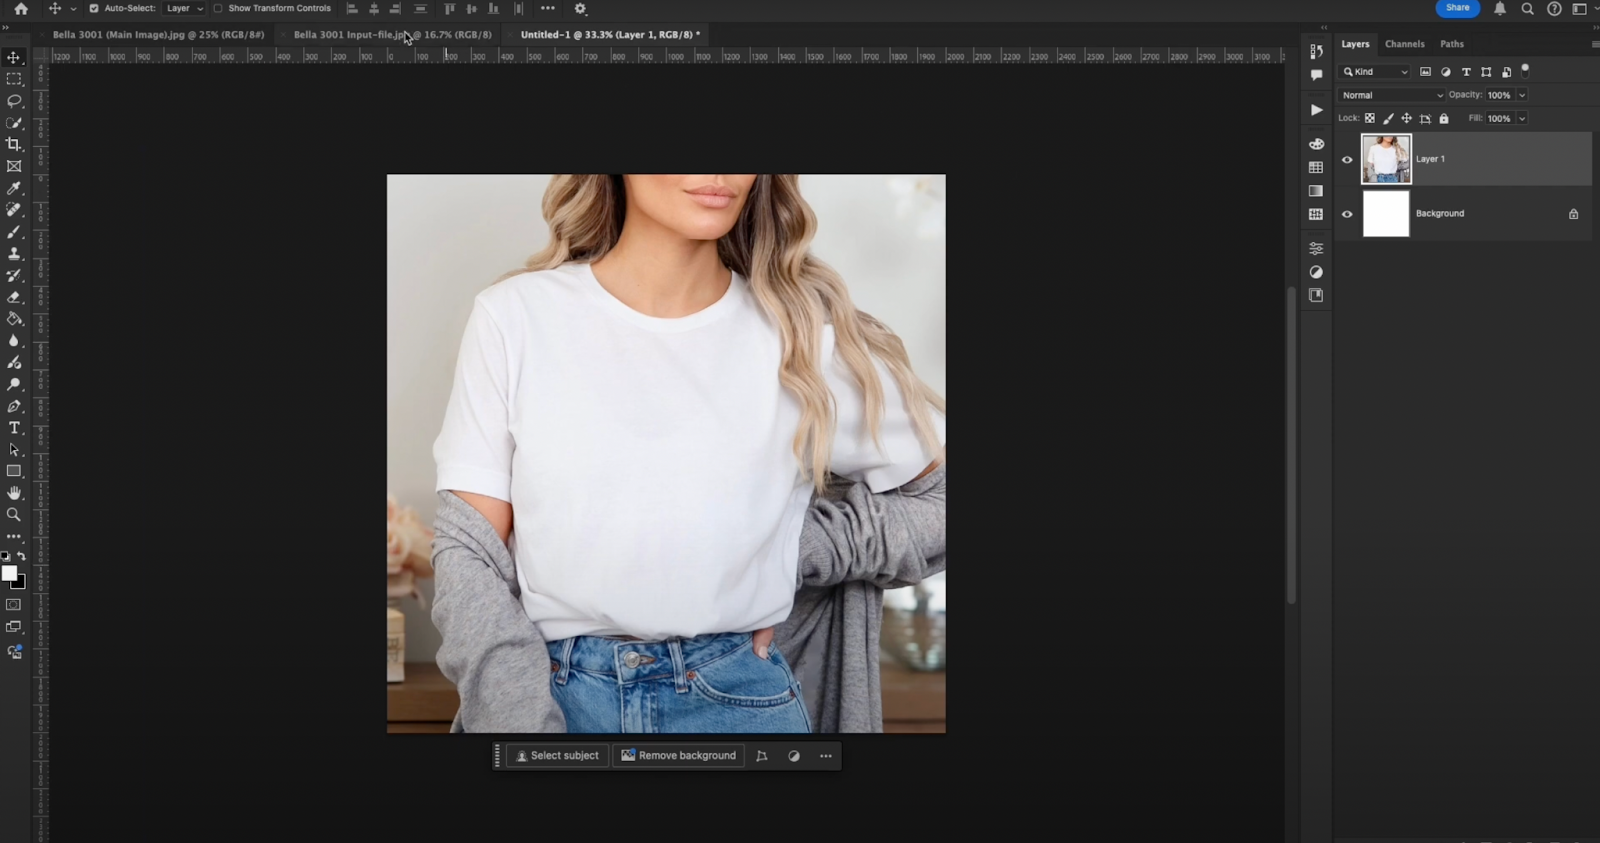
- Import the Mockup Photo:
- Open your primary mockup image.
- Select the entire image by pressing Command + A (Mac) or Control + A (Windows).
- Copy the image using Command + C (Mac) or Control + C (Windows).
- Go back to your blank canvas and paste the image using Command + V (Mac) or Control + V (Windows).
- Resize the image by pressing Command + T (Mac) or Control + T (Windows) and adjust it to fit perfectly within your canvas. Confirm the transformation by pressing Enter.
- Import the Design Placeholder:
- Open your input file.
- Select all (Command/Control + A) and copy the image (Command/Control + C).
- Paste the input file into your main canvas (Command/Control + V).
- Resize and position the input file so it aligns seamlessly with your mockup photo.
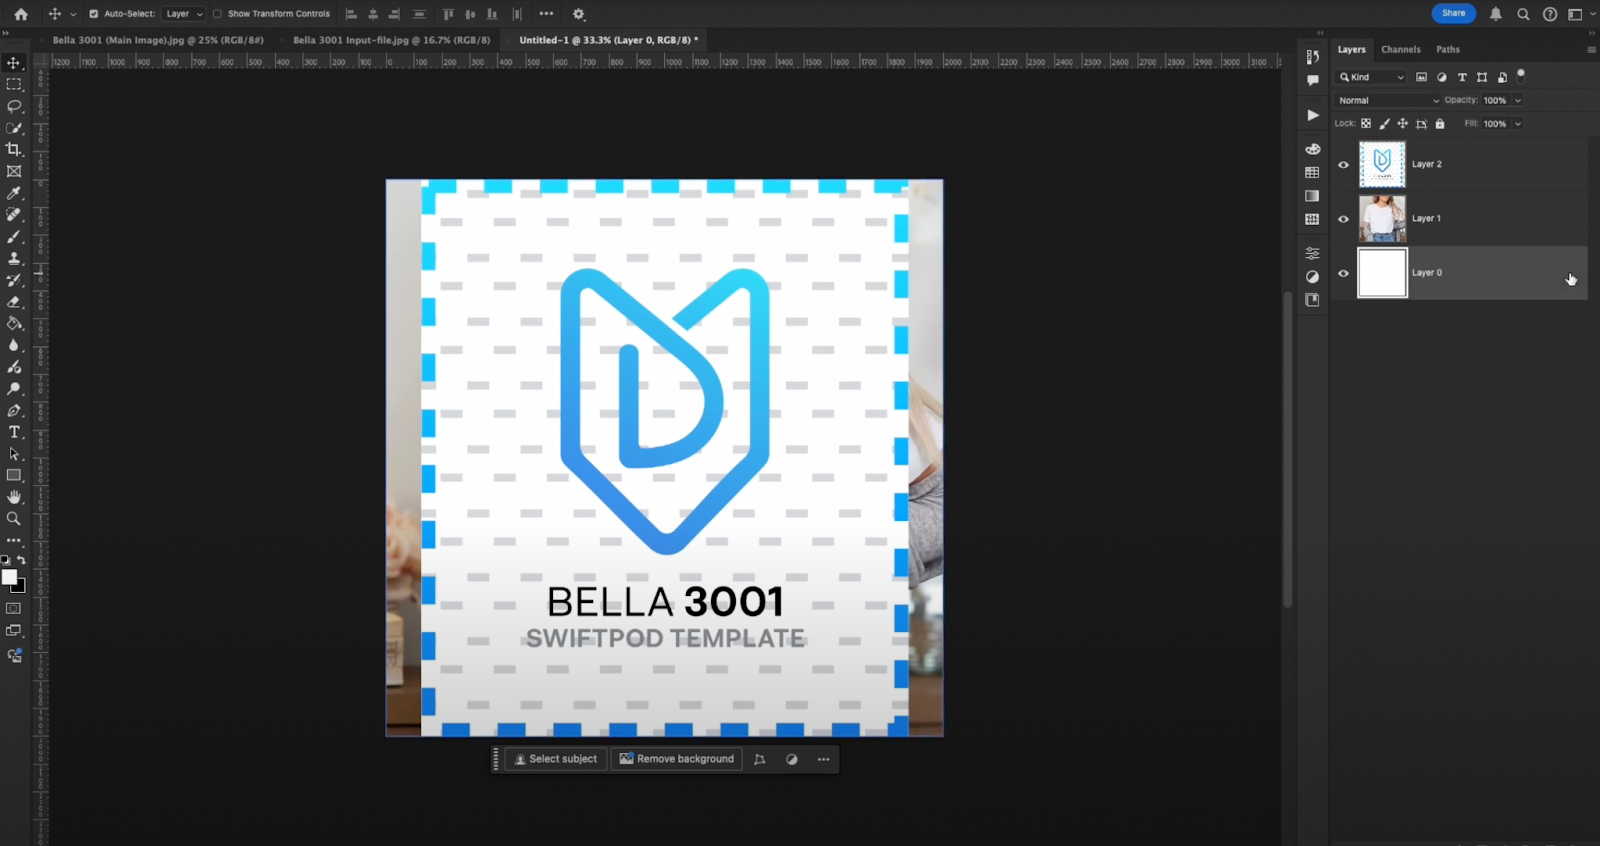
After these steps, you should see three layers in your Photoshop document: the primary mockup image, the design placeholder, and the background.
Step 4: Optimize and Organize Layers
For a clean and manageable PSD file, organization is key:
- Remove the Background Layer:
- To keep the file size down, unlock the background layer by clicking the lock icon, and delete it by clicking the trash icon.
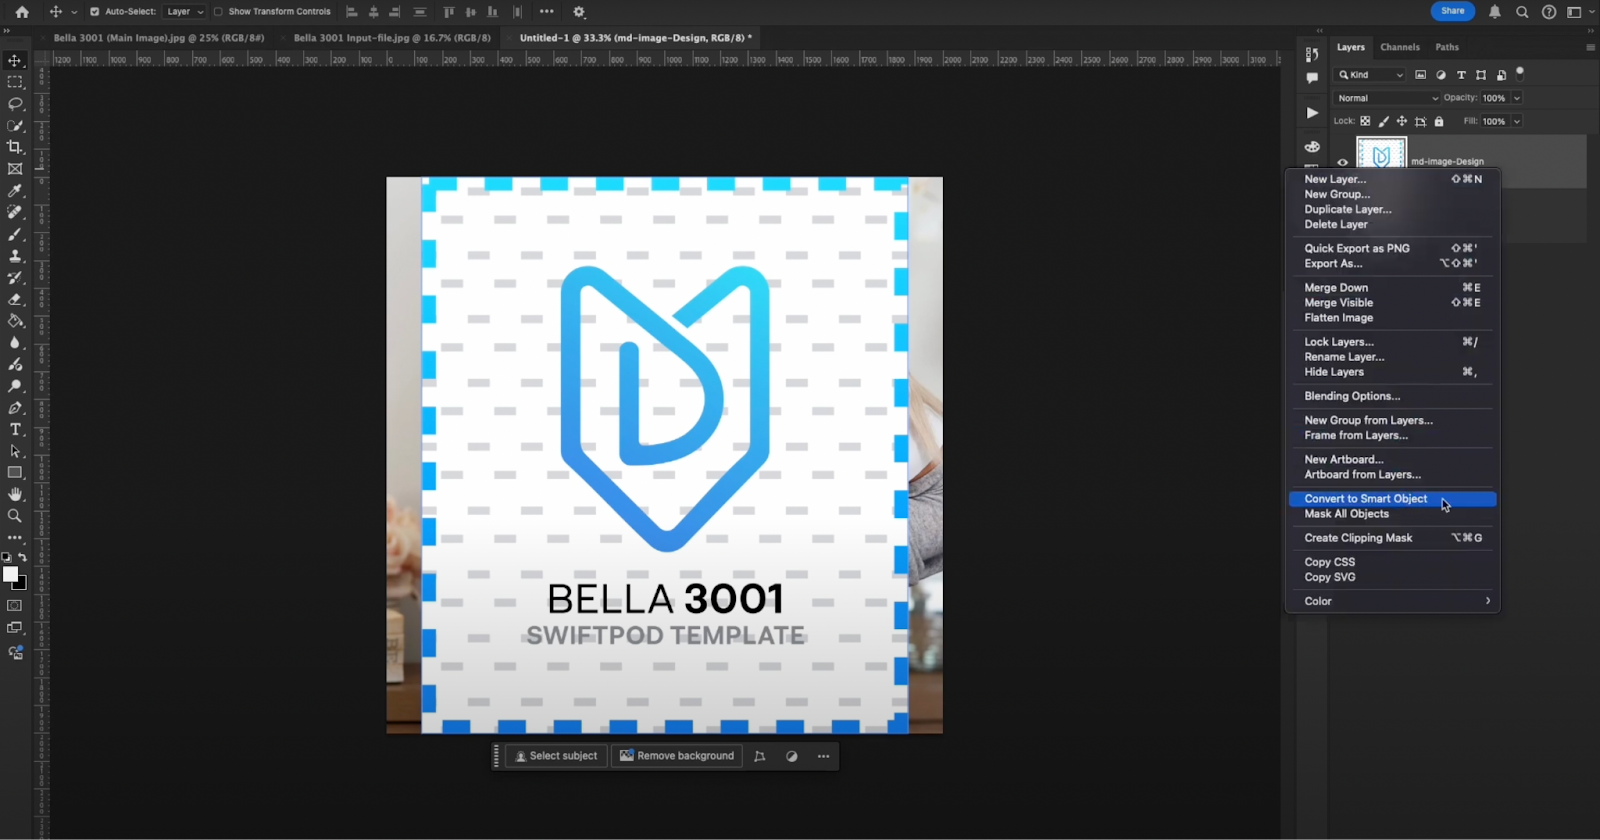
- Rename the Input File Layer:
- For clarity and consistency, rename the input file layer with a clear prefix such as “md-image-design”.
- Convert the Input File to a Smart Object:
- Right-click on the renamed layer and select “Convert to Smart Object”. This step ensures that your design placeholder remains editable and allows you to easily swap out designs later.
- Right-click on the renamed layer and select “Convert to Smart Object”. This step ensures that your design placeholder remains editable and allows you to easily swap out designs later.
Step 5: Fine-Tuning the Design Layer
To achieve a realistic and integrated look:
- Resize the Smart Object:
- Use Command/Control + T to initiate the transform function and adjust the size of your design layer as necessary.
- Adjust Opacity:
- To blend the design more naturally with the mockup, lower the opacity of the smart object layer (you can play around with the opacity percentage to see what works best–in our example, 85% looks professional). This subtle adjustment can make a significant difference in achieving a professional appearance.
- Test Your Design:
- Double-click the thumbnail of the smart object layer to open it in a separate window.
- Insert your test design into this document to see how it interacts with the mockup.
- Once satisfied with the placement and appearance, save the changes and return to the main PSD file.
By following these detailed steps, you’ve created a professional, reusable PSD mockup template that can be easily customized and updated for each new design you wish to showcase.
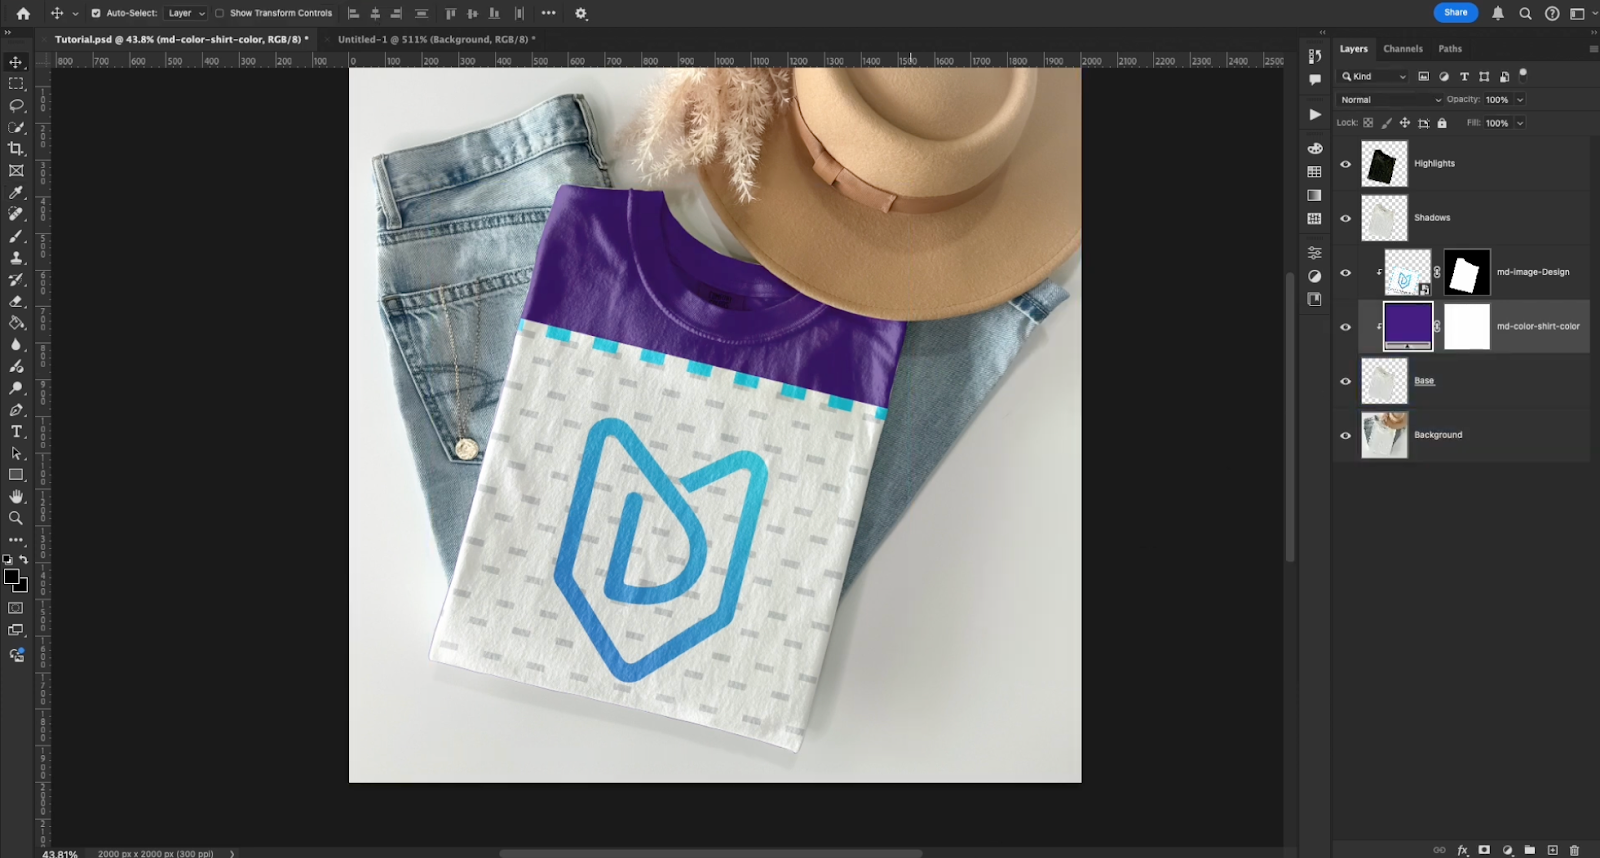
While the basic mockup creation is essential, advanced Photoshop techniques can elevate your work from good to exceptional. In this section, we explore how to apply masking, clipping masks, and special effects to add depth and realism to your PSD mockups, using the example of Comfort Colors 1717 shirt, a blank flat lay shirt.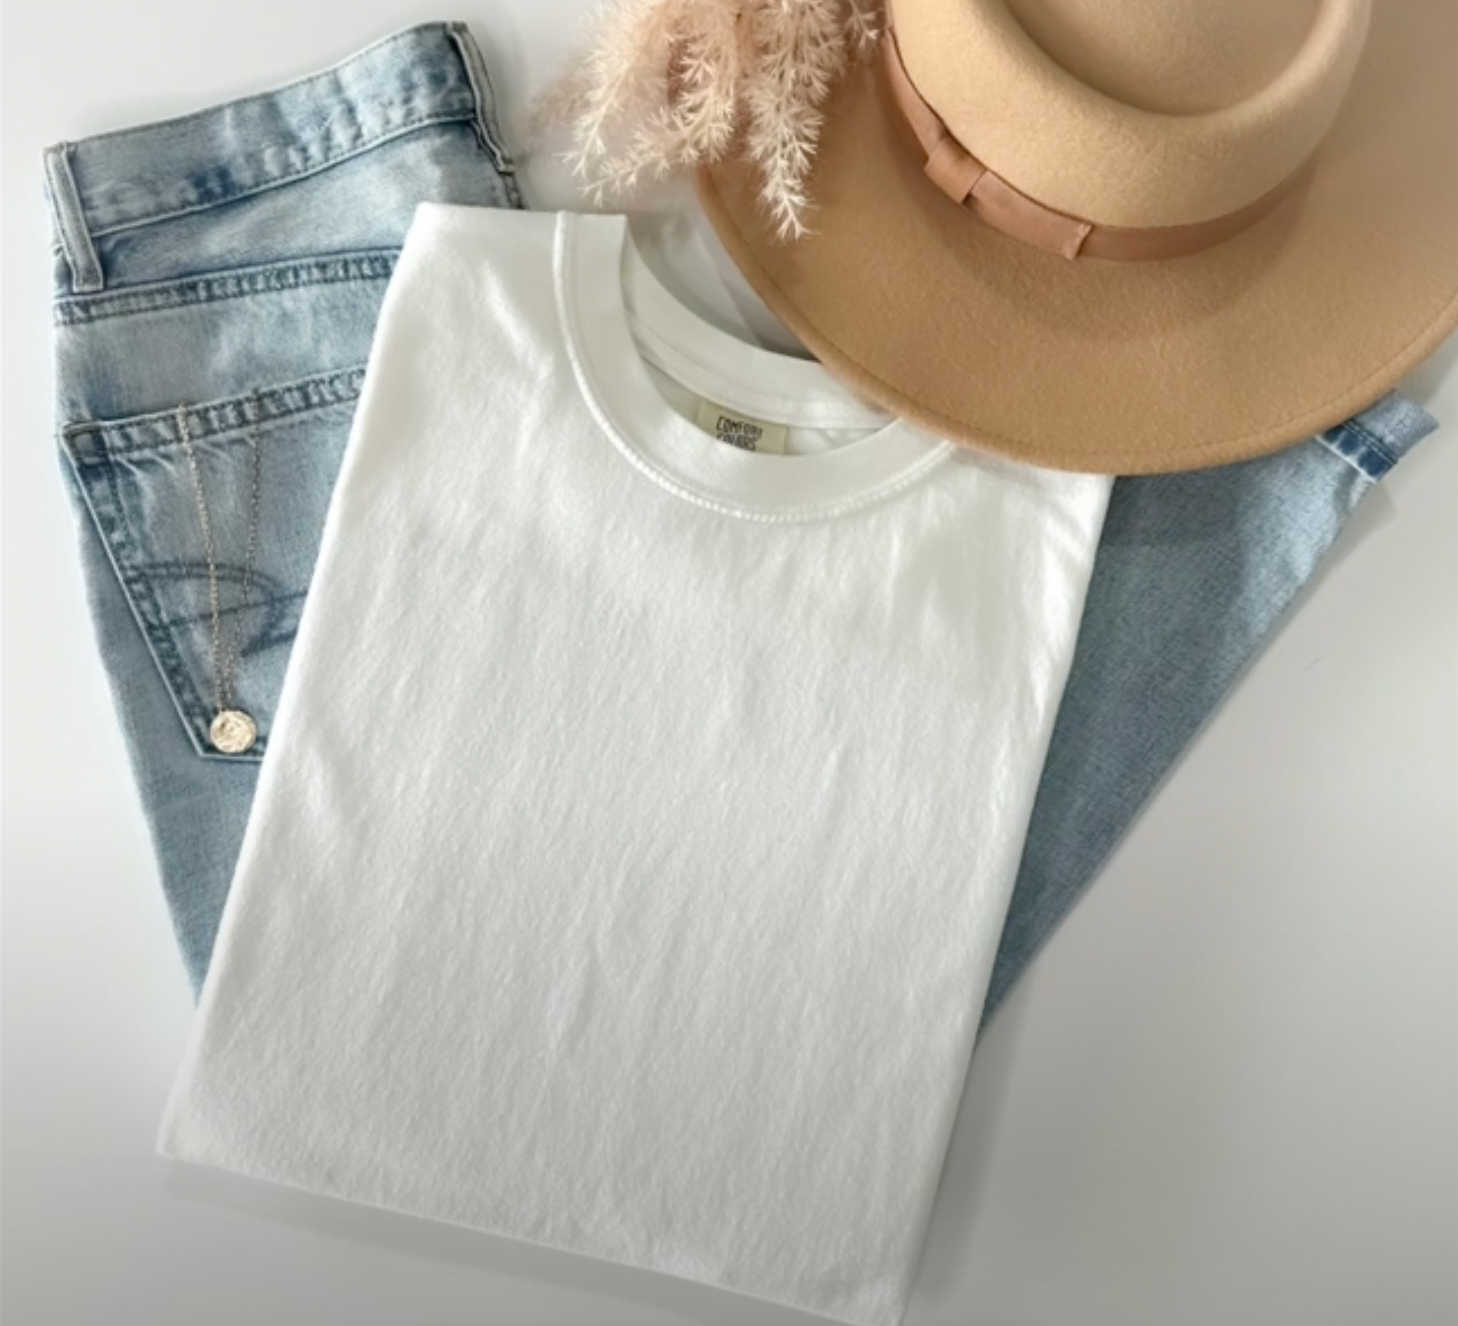
Precision Masking with the Pen Tool
When working with products such as a blank flat lay shirt, precision is crucial. Masking allows you to isolate the product and seamlessly integrate your design.
Steps for Precise Masking:
- Select the Product:
- Although you can use tools like the Object Selection tool or Quick Selection tool, the Pen tool offers unmatched precision.
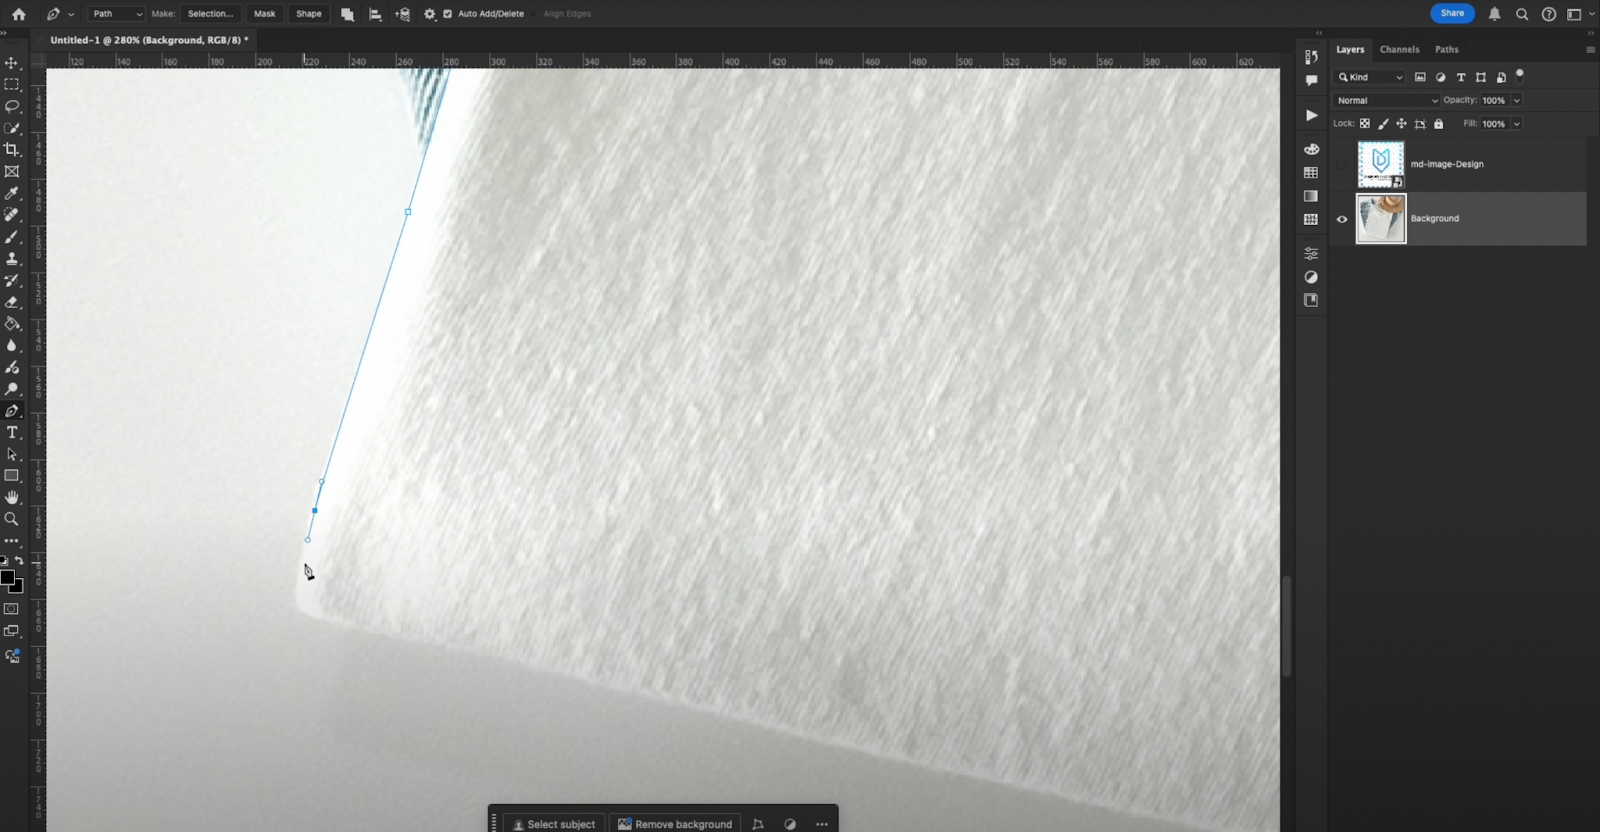
- Outline the Shirt:
- Use the Pen tool to carefully trace around the contours of the shirt. Ensure that you connect the last point to the first to close the path.
- Create a Smooth Selection:
- Right-click on the completed path and choose “Make Selection.”
- Set the feather radius to 0.3 pixels to achieve a soft, natural edge. This minimizes harsh lines and creates a realistic transition between the design and the product
Creating and Applying Clipping Masks
Clipping masks are a powerful feature in Photoshop that allow you to confine a design to a specific area of your mockup—ideal for ensuring that your design appears only on the intended product area.
How to Apply a Clipping Mask:
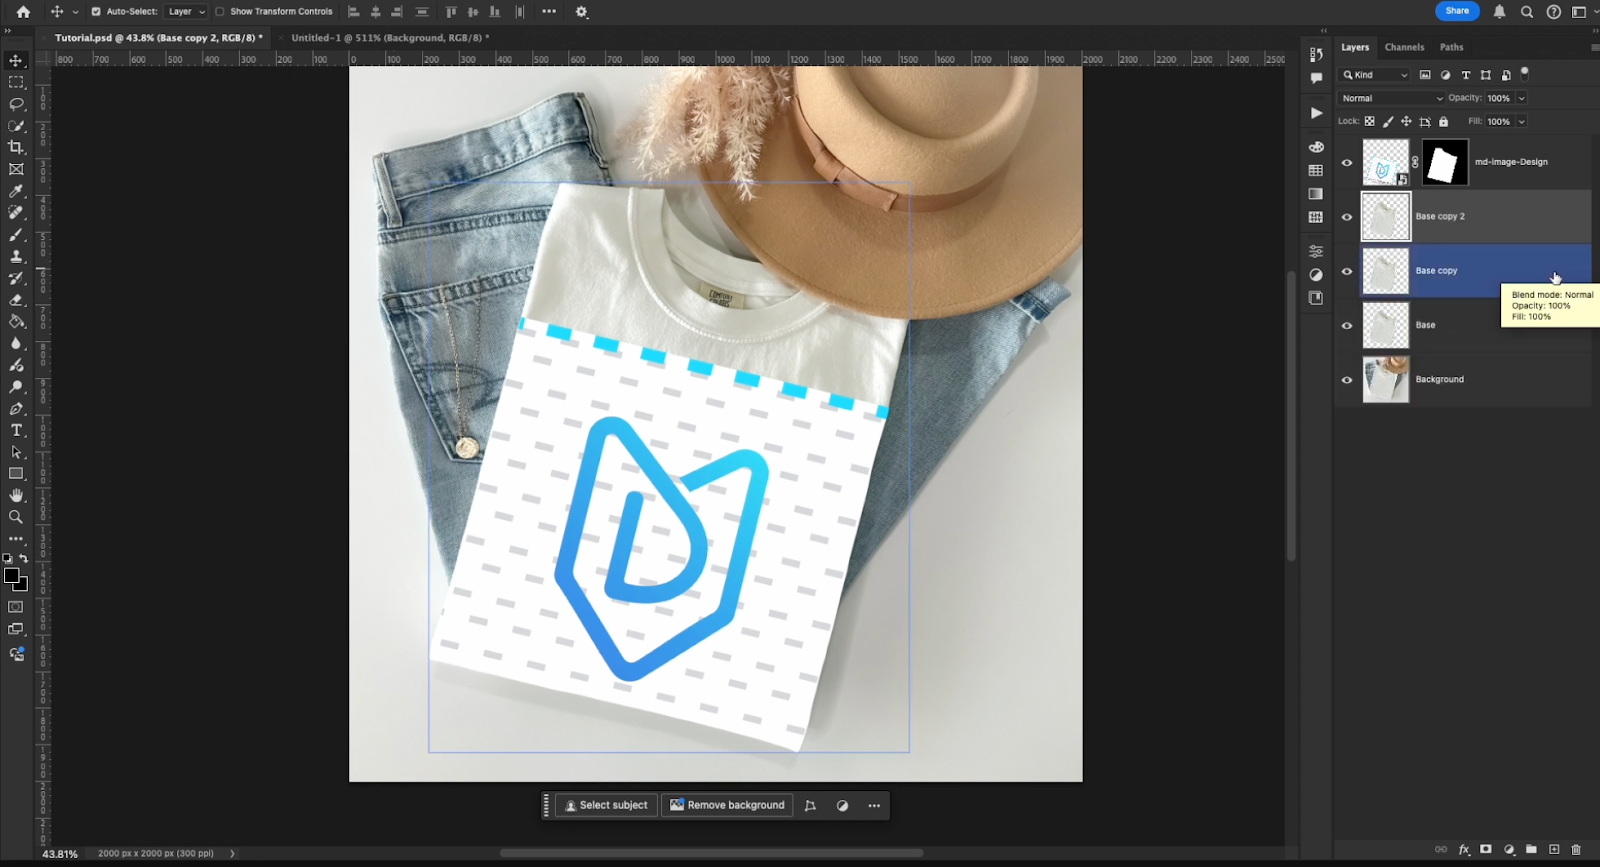
- Duplicate the Base Layer:
- With your product layer selected, press Command/Control + J to duplicate it. Rename this duplicated layer (e.g., “Bass”) for clarity.
- Resize and Position the Design Layer:
- Ensure your input file (now a smart object) is properly aligned with the product area.
- Apply the Clipping Mask:
- Hold Option (Mac) or Alt (Windows) and hover your mouse between the duplicated base layer and the design layer until you see the clipping mask icon.
- Click to create the clipping mask, which confines the design strictly to the shape of the product.
- Alternate Method:
- You can also click on the thumbnail of the base layer while holding Command/Control to generate a selection, then apply the mask icon on the design layer.
- You can also click on the thumbnail of the base layer while holding Command/Control to generate a selection, then apply the mask icon on the design layer.
Enhancing Realism with Highlights and Shadows
Adding depth through realistic highlights and shadows can transform a flat design into a three-dimensional masterpiece. Here’s how to achieve this:
Step-by-Step Process:
- Duplicate the Base Layer Twice:
- Create two additional layers by duplicating the base product layer. Rename one as “Highlights” and the other as “Shadows.”
- Adjust Layer Placement:
- Drag both the Highlights and Shadows layers above your design layer.
- Set Blend Modes:
- Change the Highlights layer’s blend mode to Screen. This mode brightens the image, simulating the effect of light hitting the fabric.
- Change the Shadows layer’s blend mode to Multiply. This adds depth by darkening areas, mimicking natural shadows.
- Fine-Tune Brightness and Contrast:
- For the Highlights layer, use the brightness/contrast adjustment (for instance, using the Ed Legacy preset with brightness set to -100 and contrast at +50) to achieve the desired effect.
Adding Custom Color Adjustments
To further customize your mockup and ensure it matches the product’s actual look, consider adding a custom color adjustment layer.
How to Apply Custom Color Adjustments:
- Select the Base Layer:
- Locate the half-moon icon at the bottom of your screen and click on it.
- Choose “Solid Color”:
- This allows you to overlay a color onto the product. For example, if you’re working with a white shirt, set the solid color to white.
- Clip the Color Layer:
- Clip the color adjustment layer to the base product layer. This ensures that the color only affects the designated area.
- Rename the Layer:
- Give the layer a descriptive name such as “MD-Color-Shirt DAS Color” to keep your file organized.
- Give the layer a descriptive name such as “MD-Color-Shirt DAS Color” to keep your file organized.
By combining these advanced techniques—precision masking, clipping masks, highlights, shadows, and custom color adjustments—you can create PSD mockups that not only look stunning but also convey the true quality and details of your product.
After perfecting your PSD mockup in Photoshop, the next step is to integrate it into the MyDesigns platform. MyDesigns streamlines the process of managing and publishing product listings, making it an invaluable tool for e-commerce entrepreneurs and print-on-demand sellers. In this section, we’ll cover how to upload your custom PSD mockup, configure it correctly, and generate bulk designs with ease.
Step 1: Access the Custom Mockups Section
Begin by logging into your MyDesigns account. Once you’re in:
- Navigate to the Mockups Tab:
- On the left-hand menu, click on the Mockups tab.
- Select “Custom Mockups” to access the dedicated section for uploading your PSD files.
- Review Upload Guidelines:
- Familiarize yourself with the requirements for your PSD files:
- Layered Format: Your PSD must be organized in layers.
- Smart Objects: Ensure your design placeholder is a smart object.
- Design Placement: Verify that the design is properly aligned and sized.
- Proper Dimensions: Stick to the recommended dimensions for optimal performance.
- Familiarize yourself with the requirements for your PSD files:
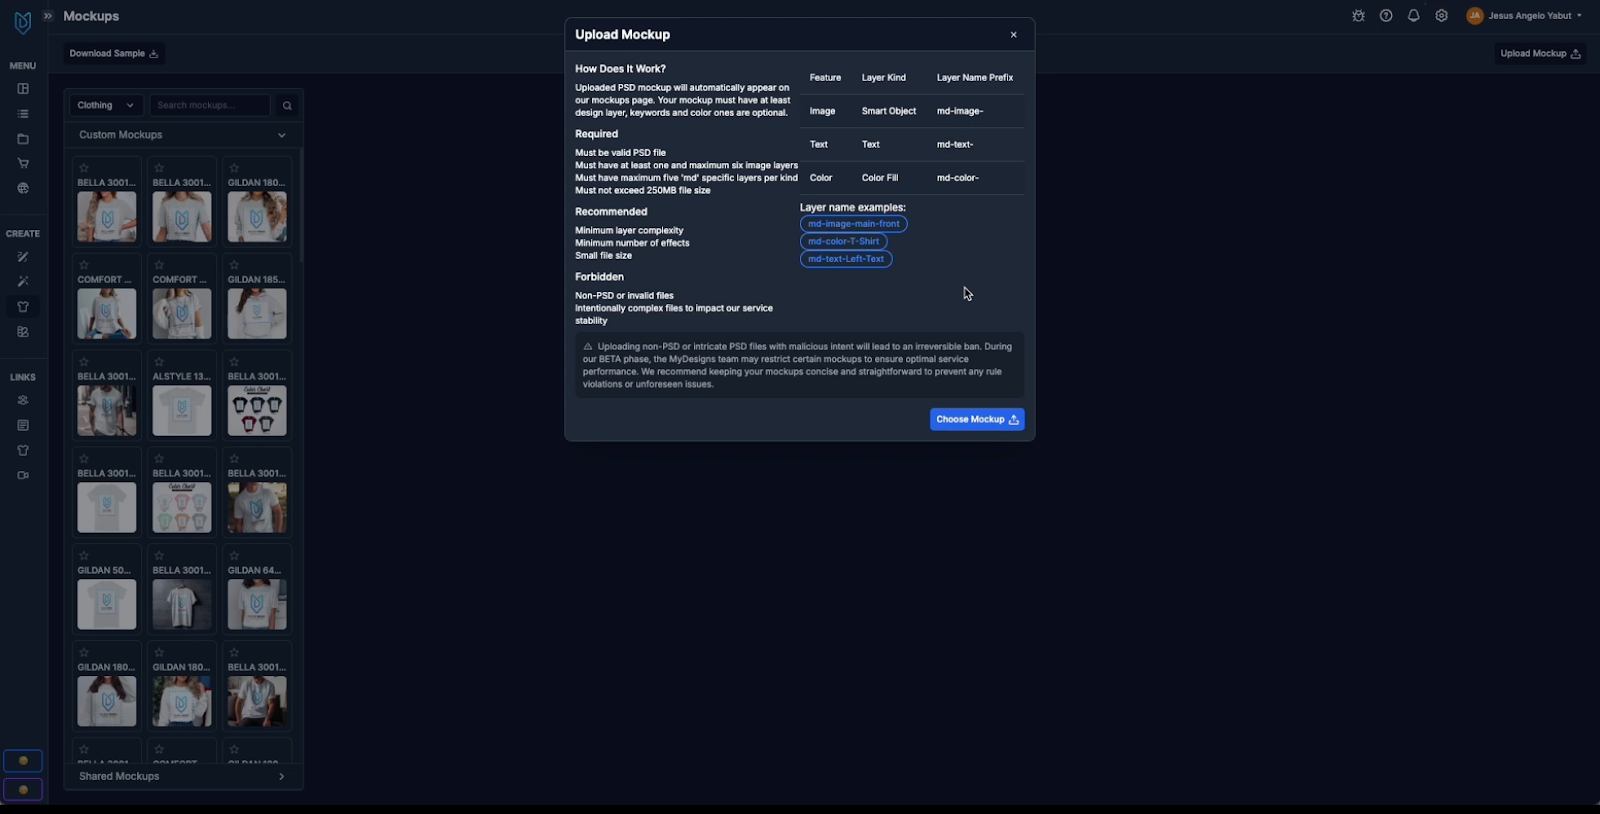
Step 2: Upload Your PSD Mockup
With your file ready, follow these steps to upload:
- Click “Upload Mockup”:
- In the Custom Mockups section, hit the “Upload Mockup” button.
- Select Your File:
- Choose the PSD mockup you created in Photoshop.
- Confirm the Upload:
- Once the file is selected, click the “Upload Mockup” button.
- Your mockup should now appear in your custom mockup library, ready for configuration.
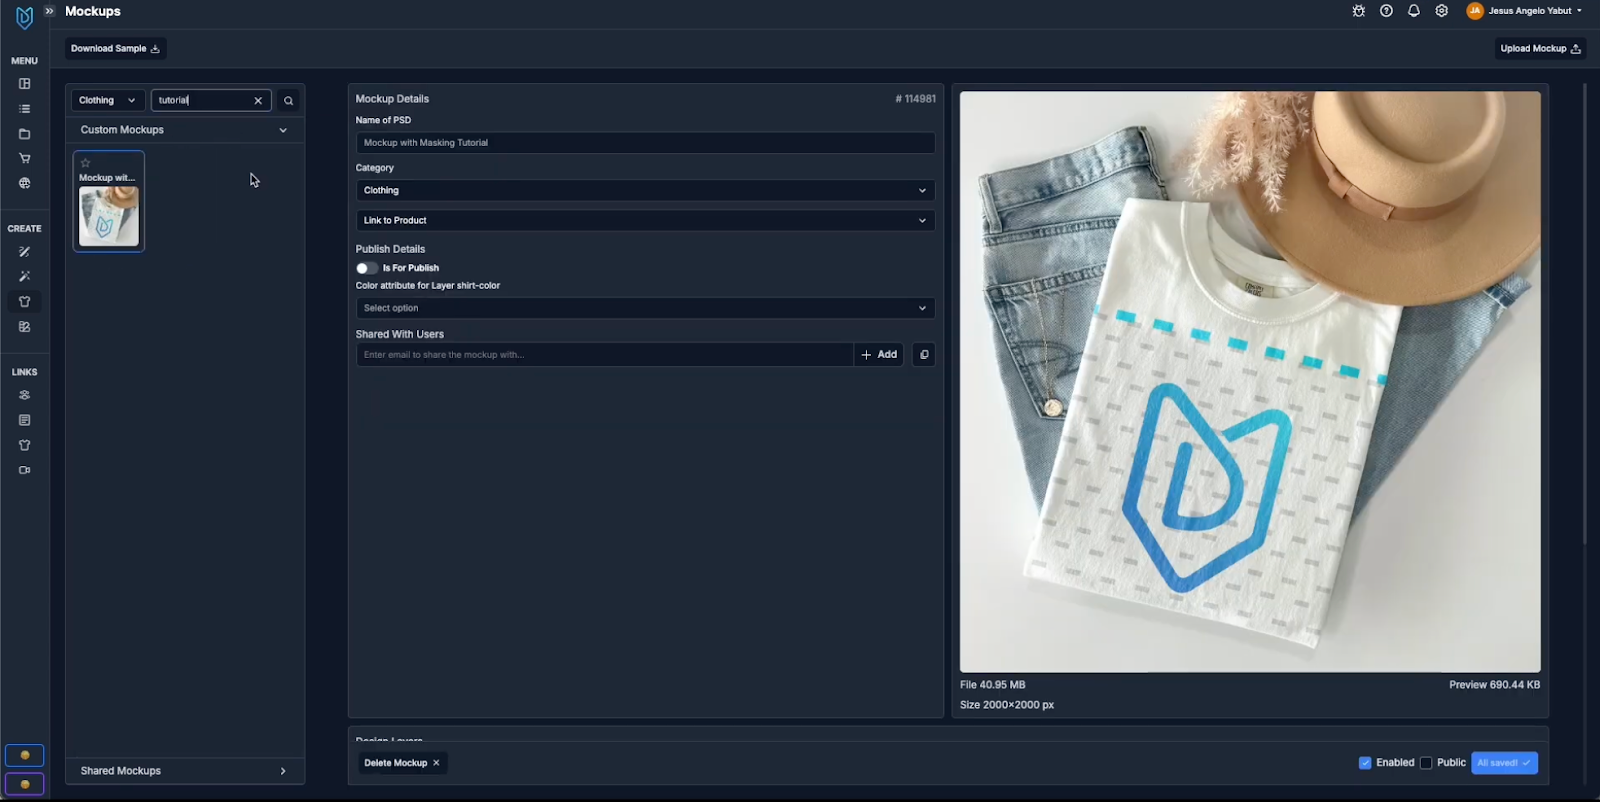
Step 3: Configure Base Mockup Settings
After uploading, it’s essential to set up the base settings to ensure your mockup functions correctly within the MyDesigns ecosystem.
- Categorize Your Product:
- Select the appropriate category for your product (e.g., Clothing for a t-shirt).
- Link the Product:
- If your mockup is associated with a specific product (like the Comfort Color 1717 shirt), make sure to link it accordingly.
- For products available in multiple variations, you may also need to select both Men and Women options.
- Custom Color Settings:
- If your design supports custom colors, choose the correct color attribute (e.g., “Shirt Color”).
- Save Changes:
- After configuring these settings, click “Save Changes” to lock in your preferences.
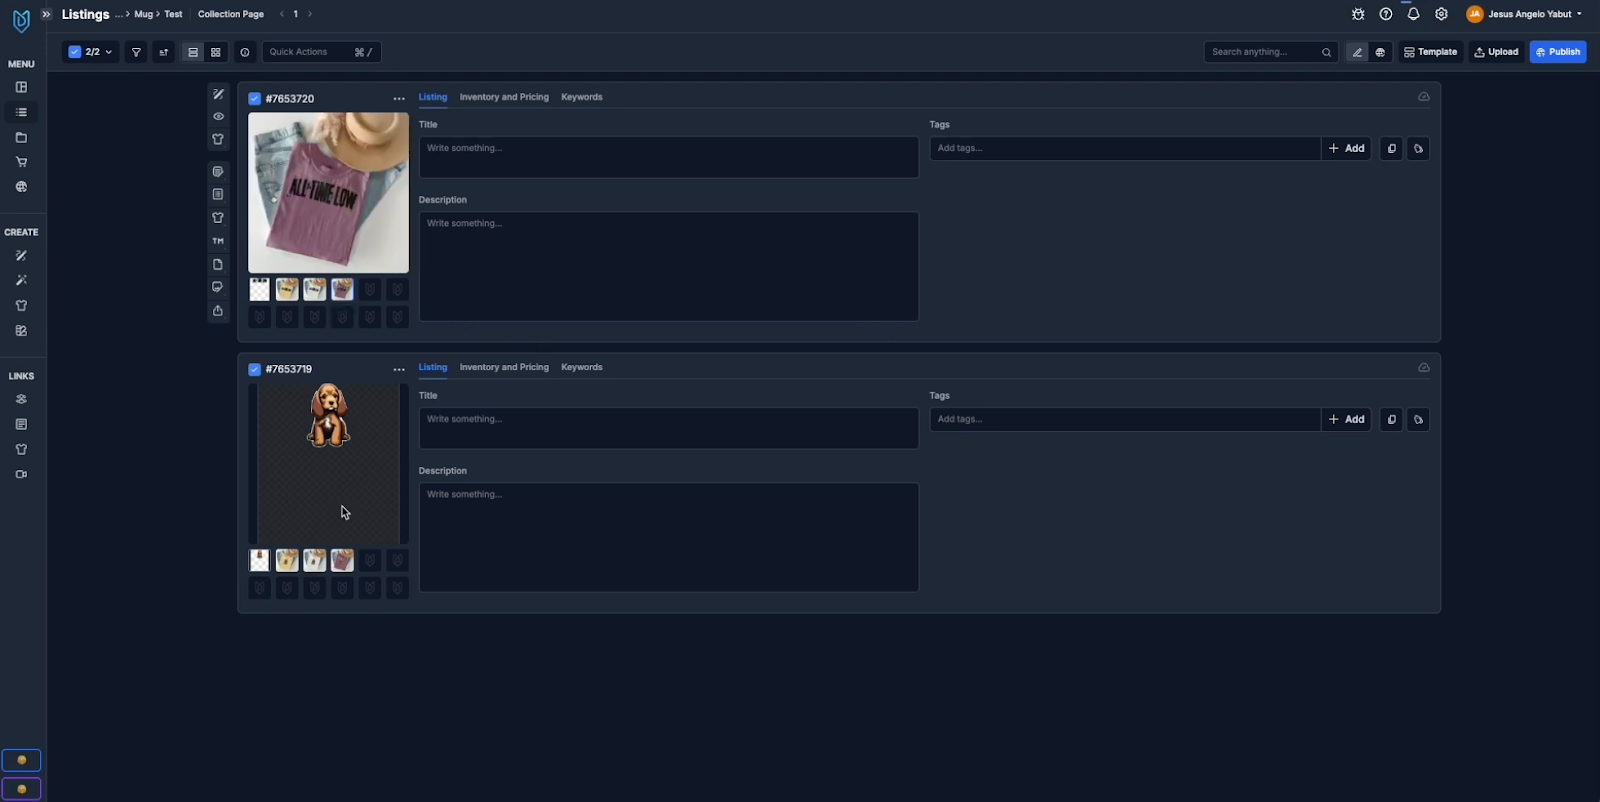
Step 4: Generate Bulk Designs Using Your PSD Mockup
MyDesigns offers a powerful bulk processing feature that saves you time when generating multiple product listings. Here’s how to take advantage of this functionality:
- Navigate to the Listing Page:
- From the MyDesigns dashboard, go to the Listings page.
- Select Your Listings:
- Choose the listing(s) for which you want to create mockups. You can select multiple listings to generate bulk designs.
- Access Quick Action:
- Click on “Quick Action” and choose “Image Mockup.”
- Select Your Custom Mockup:
- Under the Image Mockup options, select “Custom Mockups.”
- Search for and choose the mockup you just uploaded.
- Verify the File Slot:
- Ensure that the file slot corresponds to your design input (the smart object you created in Photoshop).
- Choose Custom Colors (if applicable):
- If your mockup supports custom colors, select up to 10 different color options. MyDesigns will display all available colors based on your linked product settings.
- Preview and Generate:
- Optionally, generate a preview to ensure everything is aligned and displaying correctly.
- Once confirmed, click “Generate Mockup” to process your bulk listings.
- The system will handle the rest, applying your custom PSD mockup to all selected listings in a matter of moments.
Benefits of Bulk Processing in MyDesigns
- Efficiency:
- Generate high-quality product images across multiple listings with just a few clicks.
- Consistency:
- Ensure that all your products maintain a consistent look and feel, which is crucial for brand recognition.
- Scalability:
- Save time and resources when managing large inventories, freeing you to focus on other critical aspects of your business.
Additional Tips and Best Practices
To help you further refine your workflow and get the most out of your custom PSD mockups, consider the following additional tips:
- Consistency is Key:
- Always use uniform design placeholders and naming conventions (e.g., “md-image-design”) across your PSD files. This not only simplifies the process but also minimizes errors during bulk processing.
- Test Early and Often:
- Regularly test your PSD mockup by inserting different designs. This ensures that the smart objects and clipping masks are set up correctly and that the overall composition looks as intended.
- Keep Your File Organized:
- Use clear layer names and group related layers together. An organized file structure makes it easier to make adjustments and troubleshoot issues later on.
- Leverage Blend Modes:
- Experiment with different blend modes such as Screen for highlights and Multiply for shadows. These adjustments can significantly enhance the depth and realism of your mockups.
- Stay Updated with Guidelines:
- Always check MyDesigns’ latest upload guidelines and specifications to ensure your PSD mockups meet the required standards. This can prevent potential issues during the upload and bulk generation process.
- Backup Your Files:
- Maintain backups of your PSD mockup files and original assets. This way, if you need to revert any changes or recreate a design, you have all the necessary resources on hand.


Leave a Reply