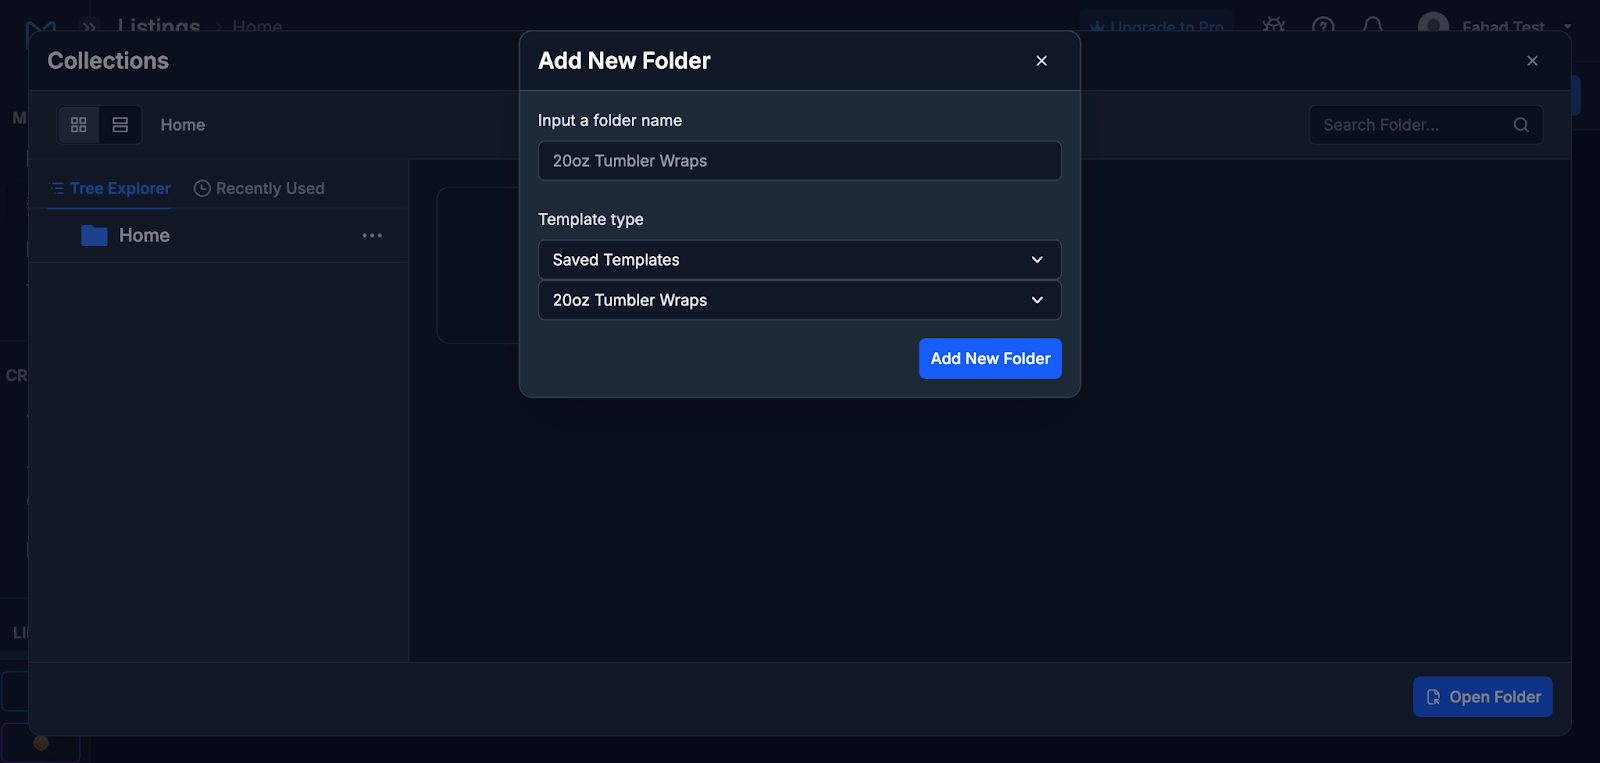
First, open the Listings page and click Home on the top-left corner of your screen. This is how you access your MyDesigns folders. Next, create a new folder and give it a suitable name, e.g. “20oz Tumbler Wraps” and choose Template Type as Saved Templates → 20oz Tumbler Wraps.
 With basics out of the way, we’re ready to start our design process. Our design journey begins with turning a simple idea into a beautiful tumbler wrap design using Dream AI. Dream AI is MyDesigns’ built-in image generation tool, which harnesses powerful AI models to create original artwork from text prompts. This means even if you’re not an artist, you can dream up a design concept and have AI illustrate it for you in minutes – pretty amazing!
Crafting your prompt: Start by thinking of a theme or style for your tumbler wrap. For example: bright sunflowers and floral elements in a vibrant artistic style. The prompt I used in my video is:
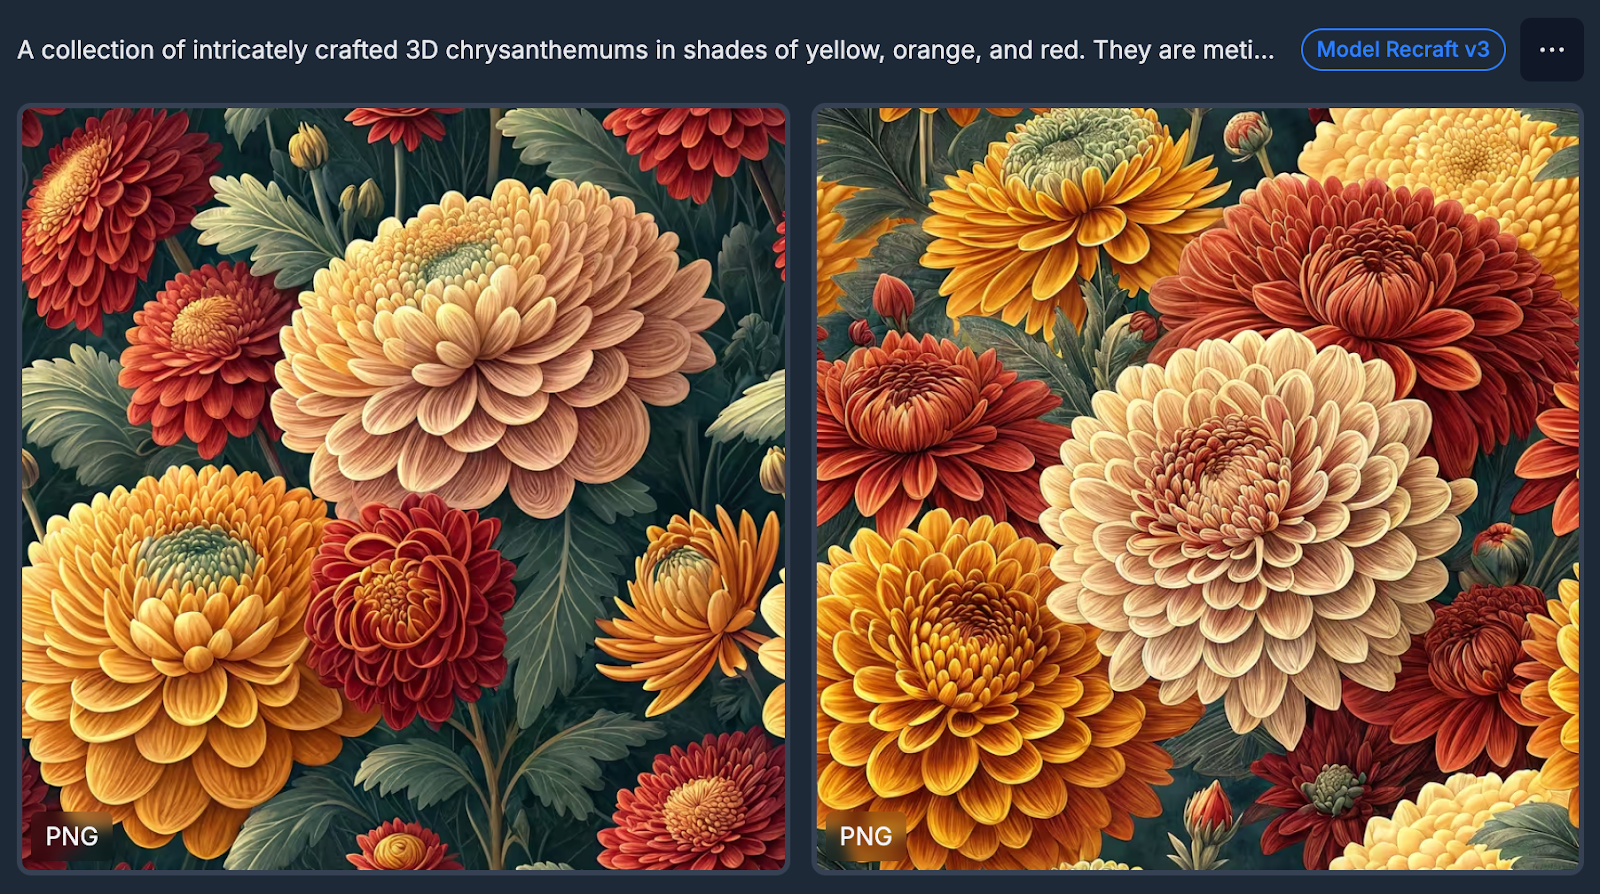
“A collection of intricately crafted 3D chrysanthemums in shades of yellow, orange, and red. They are meticulously layered and arranged in a dense pattern, creating a visually captivating backdrop. The chrysanthemums exhibit dense, multi-petaled blooms with intricate textures, each meticulously shaped to give them a lifelike appearance. The color palette is warm and vibrant, with the red chrysanthemums adding depth to the composition.”
This prompt tells the AI exactly what kind of scene and vibe I want. When writing your prompt, be descriptive about the subject (e.g. sunflowers and wildflowers), the style (colorful illustration, watercolor, realistic, cartoon, etc.), and the mood or colors you’d like. Don’t be afraid to add details – the AI will do its best to include them.
If you want more on prompt-crafting, see Introduction to Dream AI Image Generation Models—I break down which model excels at realistic photos, cartoon, vintage texture, etc.
Choosing settings and model: In Dream AI’s interface, you’ll enter your prompt text and then choose an AI model and any style presets. For tumbler wraps, I recommend using a model that produces high-detail, seamless images. In the video, I selected the “Recraft v3” model and enabled a “Illustration Seamless (PNG)” style.
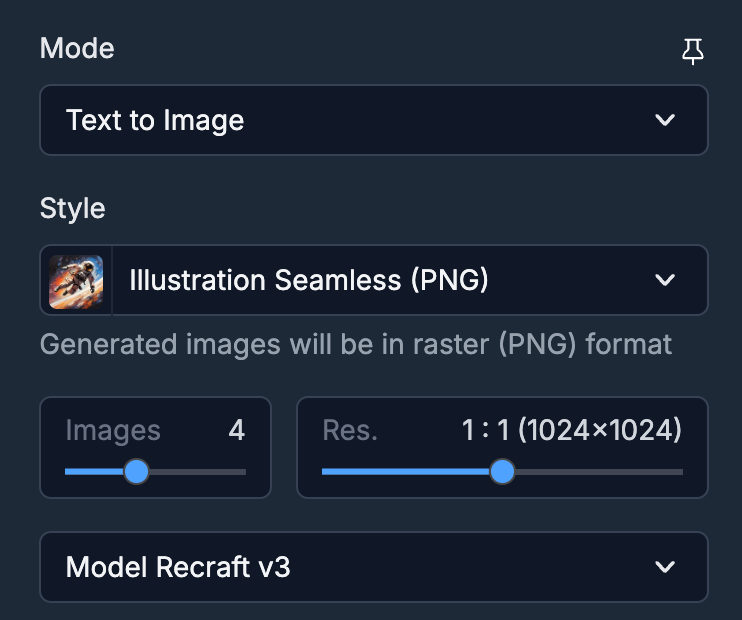 After setting the model, you can also adjust advanced options like image dimensions, aspect ratio, or number of variations.
We’ll go with 1:1 Resolution since that works best for seamless designs.
Once you’re happy with your prompt and settings, hit the “Dream” button and let Dream AI work its magic! In moments, you’ll see your AI-created artwork appear. It’s like having an on-demand artist sketching out your idea. Take a moment to appreciate the result – who knew creating art could be this easy?
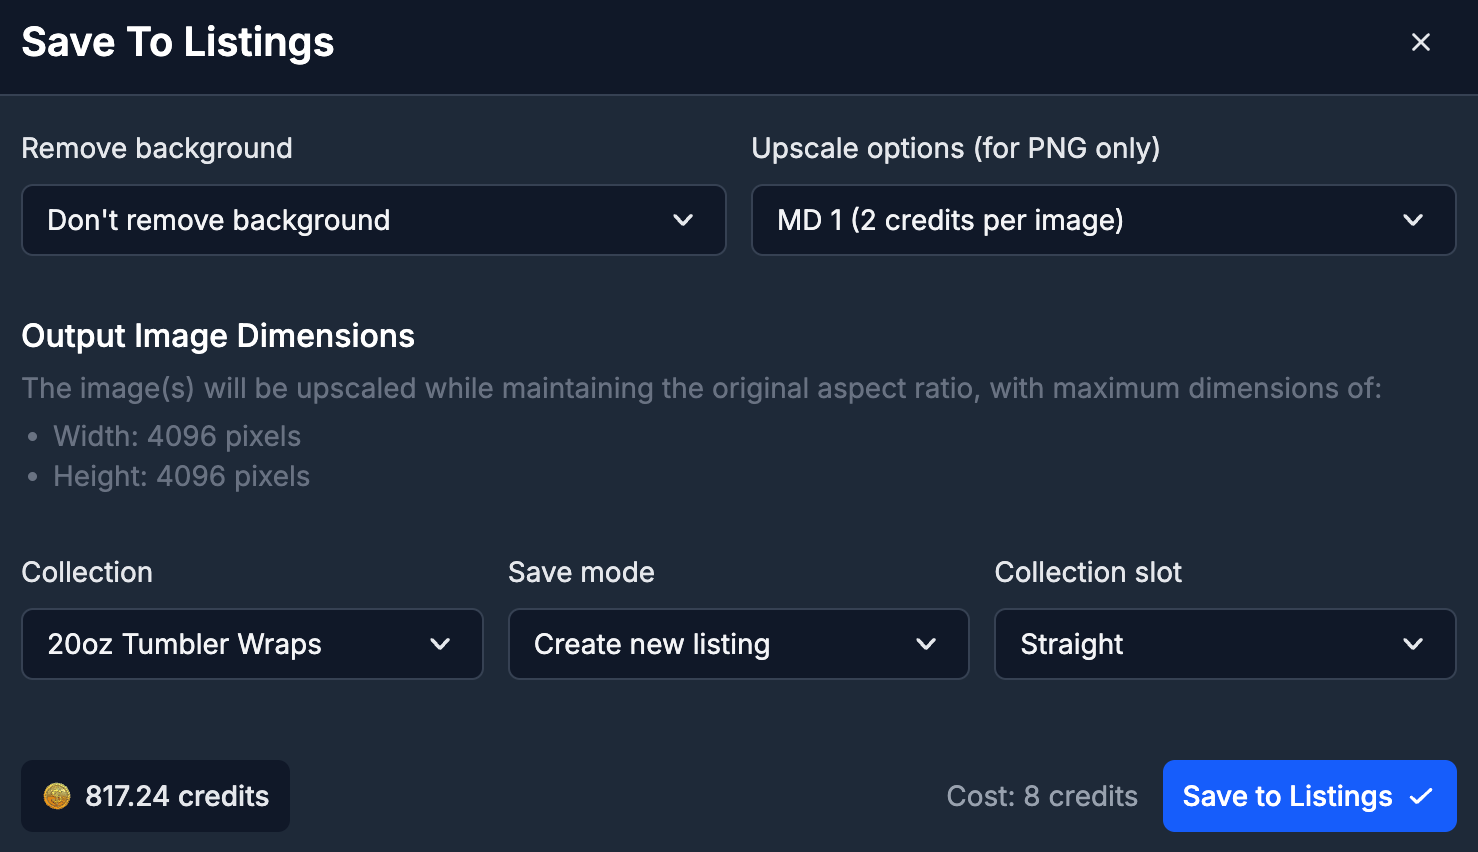
 Select the designs you like by clicking on them, and save them to Listings. Choose the folder you created for these listings, and make sure you select Straight as the Collection slot.
Now that we have a beautiful AI-generated design, it’s time to refine it for use as a high-quality tumbler wrap. For this, we’ll use MyDesigns Canvas, the integrated image editor. Canvas lets us resize, enhance, and tweak the AI image without leaving the platform. Our goals in this step are to get the design to the correct print dimensions for a 20oz tumbler and ensure the quality is crisp.
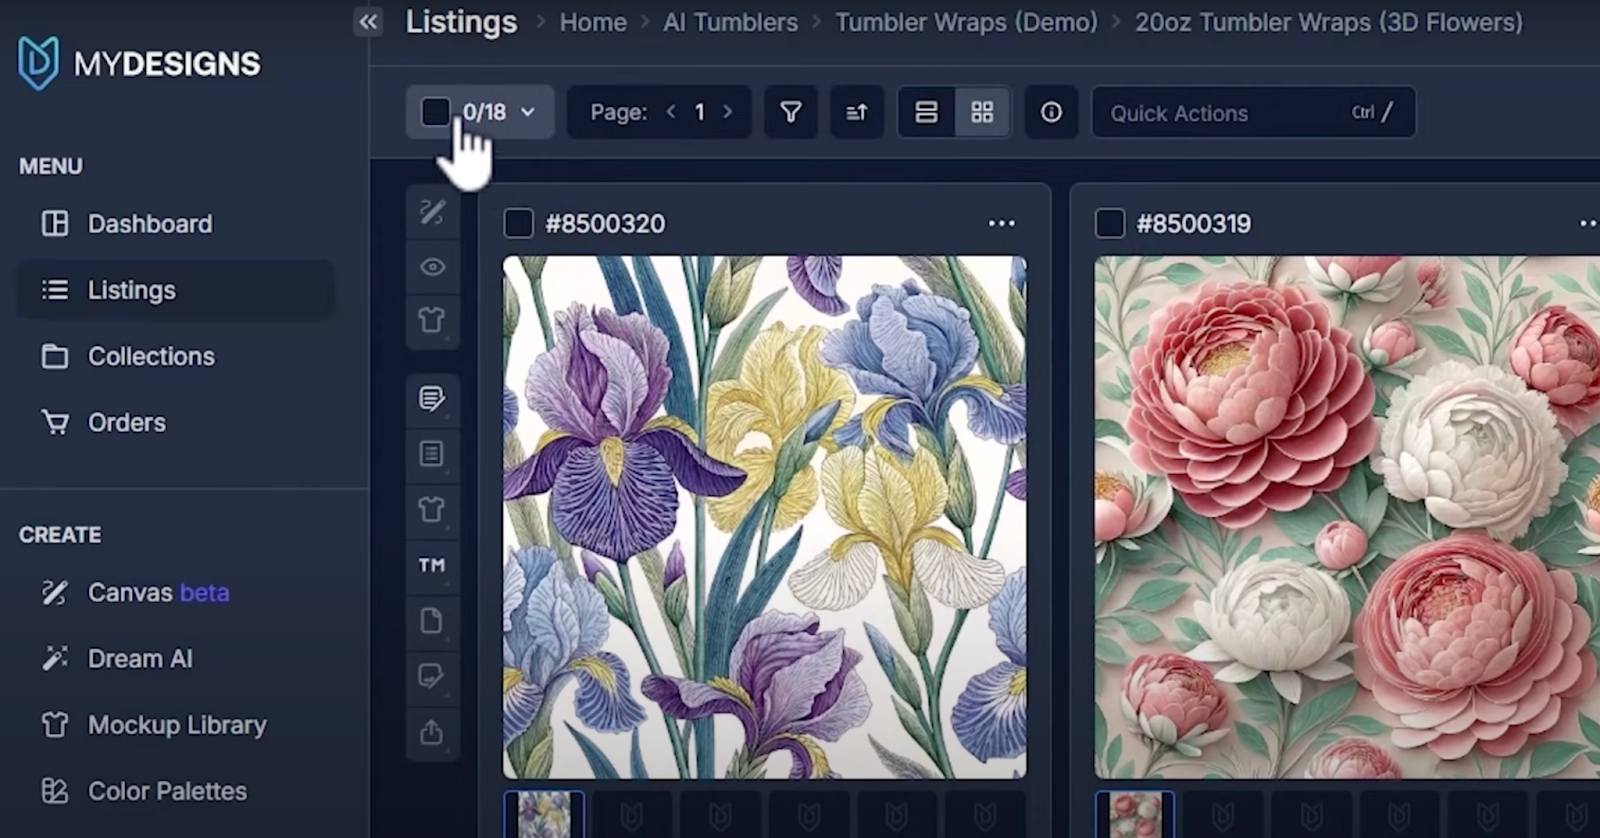
First, go to the Listings page, and select the folder you saved the generated designs in. Select all listings in the folder. Now we’re ready for some Canvas magic.
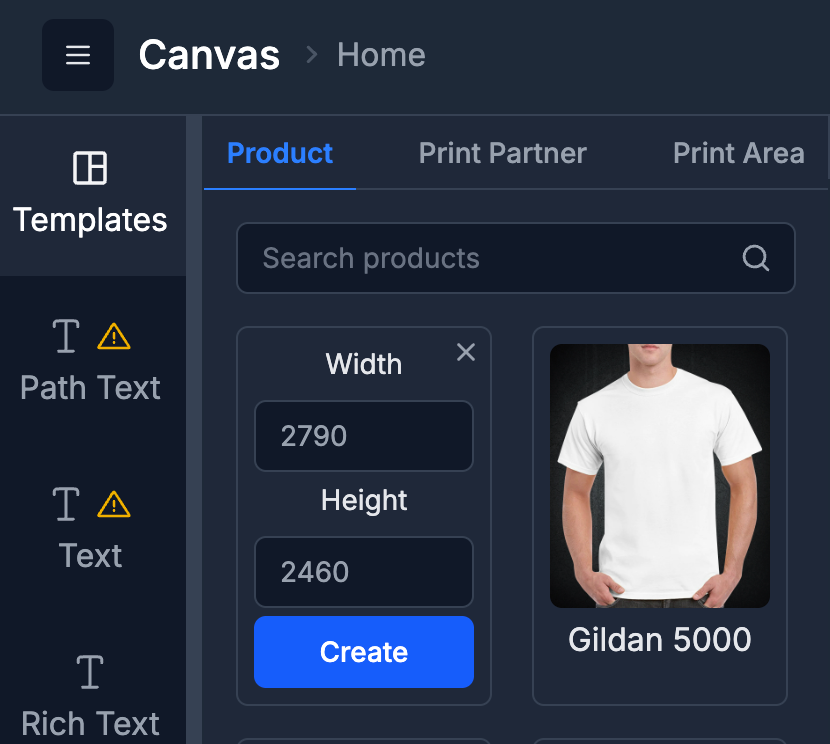
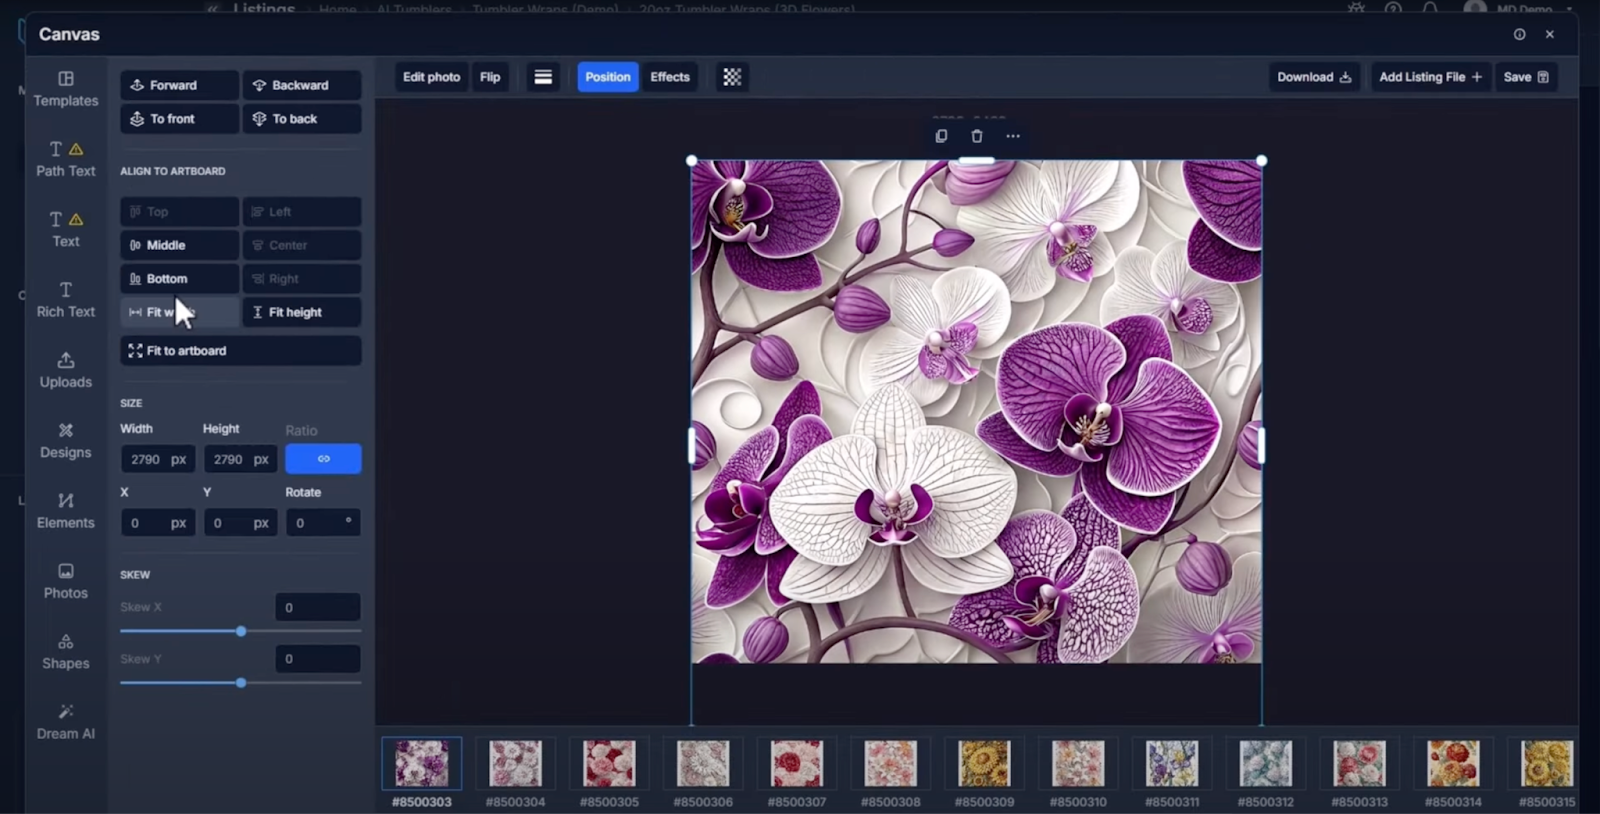
 Adjusting the Wrap Dimensions: Open Canvas and click Templates → Custom Size. Enter the following dimensions and click Create:
Width: 2790
Height: 2460
 These dimensions will be applied to all listings you selected.
Next, click Add Listing File in the top-right corner of your Canvas screen, select Straight and then click Add to All.
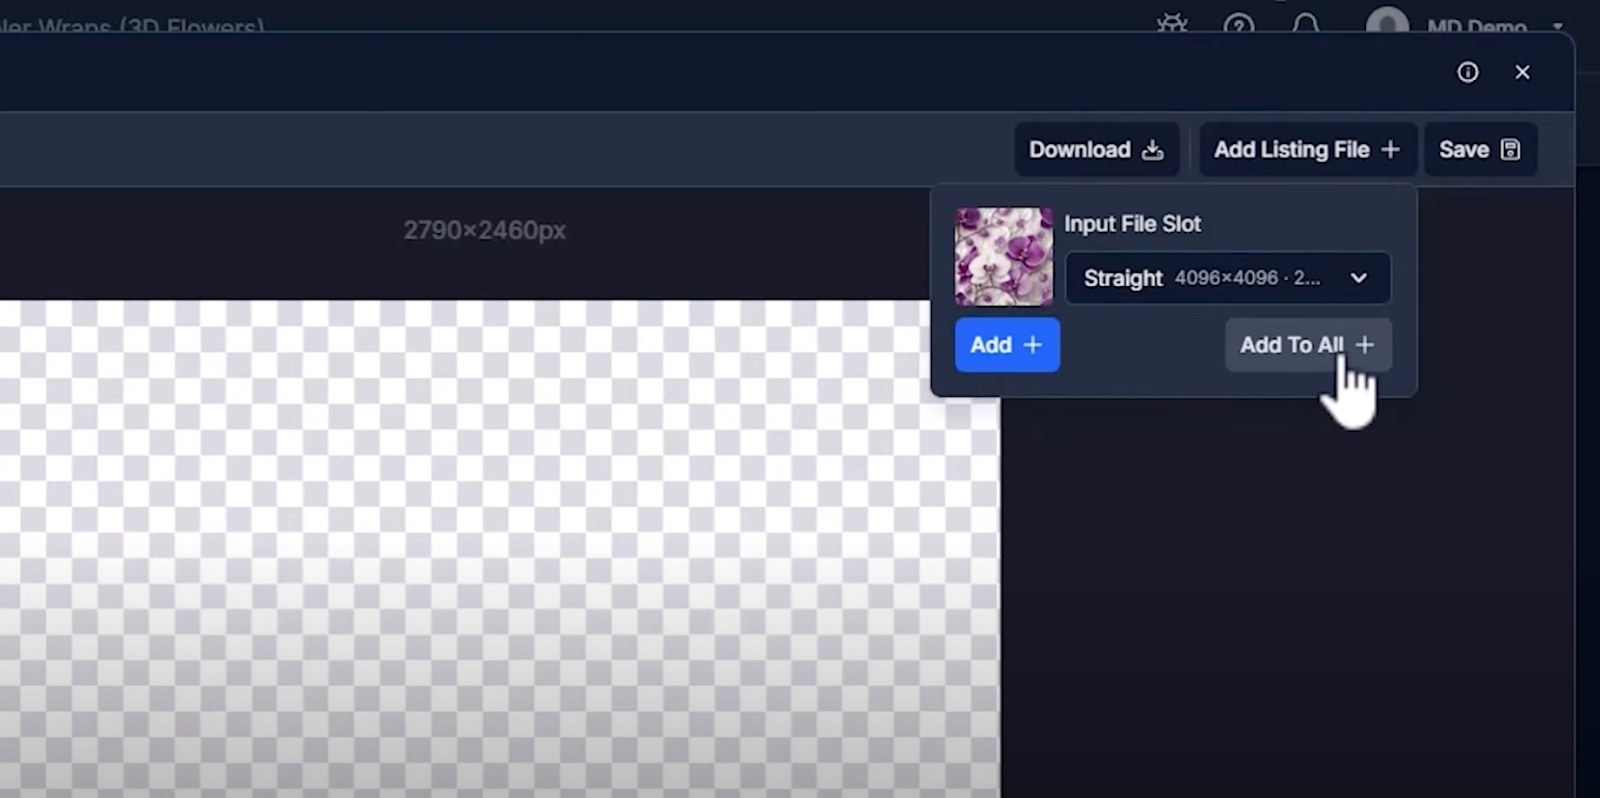 This adds the design for each listing onto their artboard.
Preparing for Wrap Prints: You might notice that there’s an extra space to the left and right side of the designs in the artboard. To fix that, click Position on your Canvas screen and select the Full Width option, and also set alignment to the Middle.
This is an important step we need to do in order to produce seamless designs. If you’re unfamiliar with the term seamless, I’ve demonstrated it in the video (see 5:18 to 5:40).
Once you’ve applied the above settings to one listing, simply right click it and click the sync option to apply these settings to all selected listings! See–all MyDesigns features come with bulk capabilities!
Finally, save all listings by overwriting all files so the old listings are replaced with new ones.
Related Read: How to Create Print-on-Demand Designs with MyDesigns.
Images sell – especially on Etsy. To attract customers to click on your tumbler wrap listing, you’ll want gorgeous mockup photos that show how the design looks on an actual tumbler.
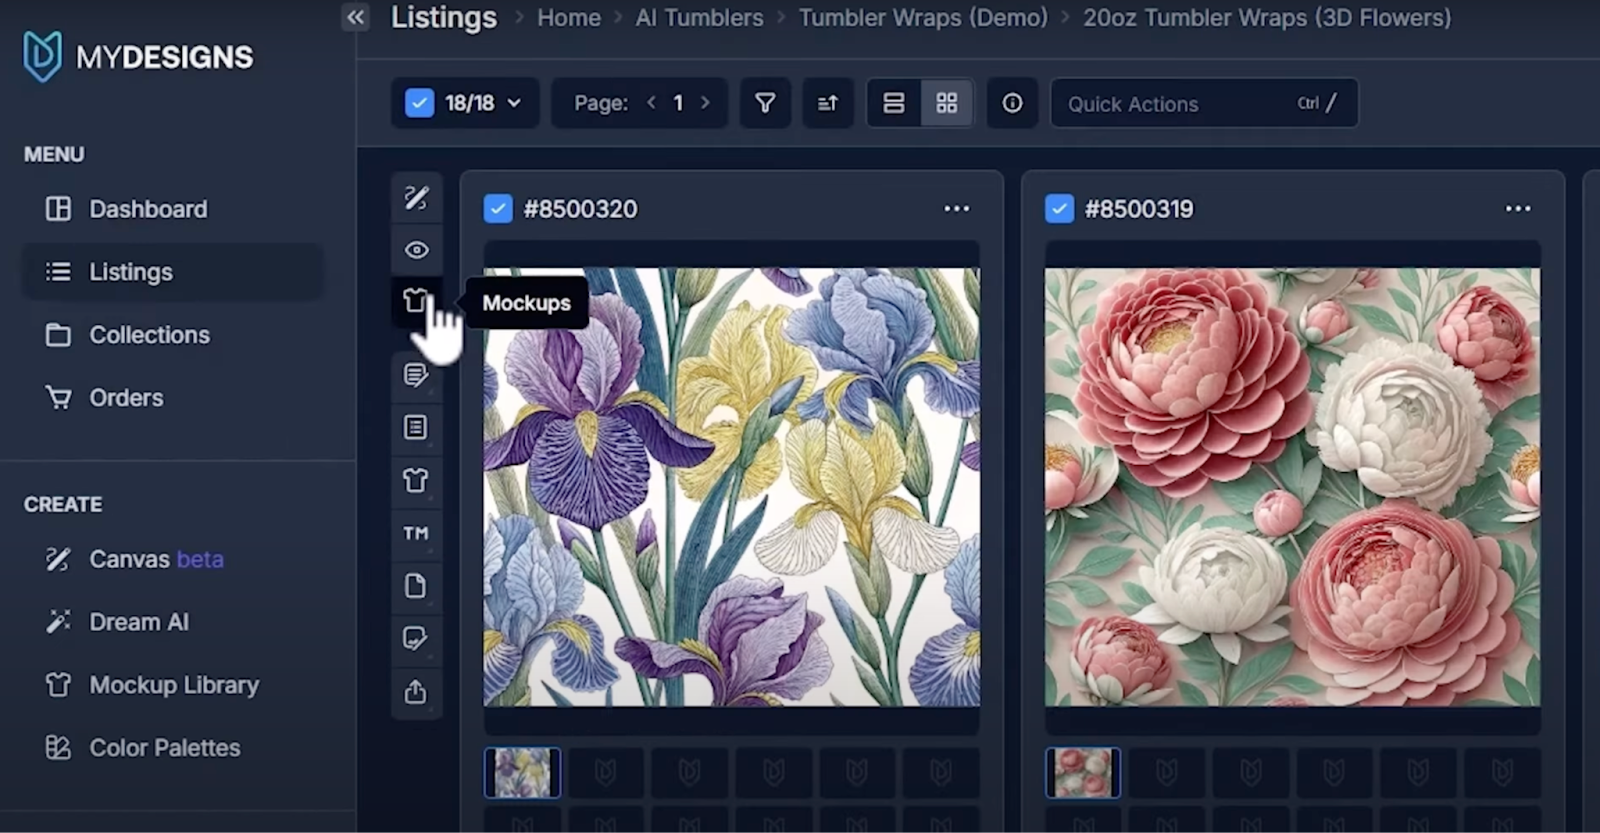
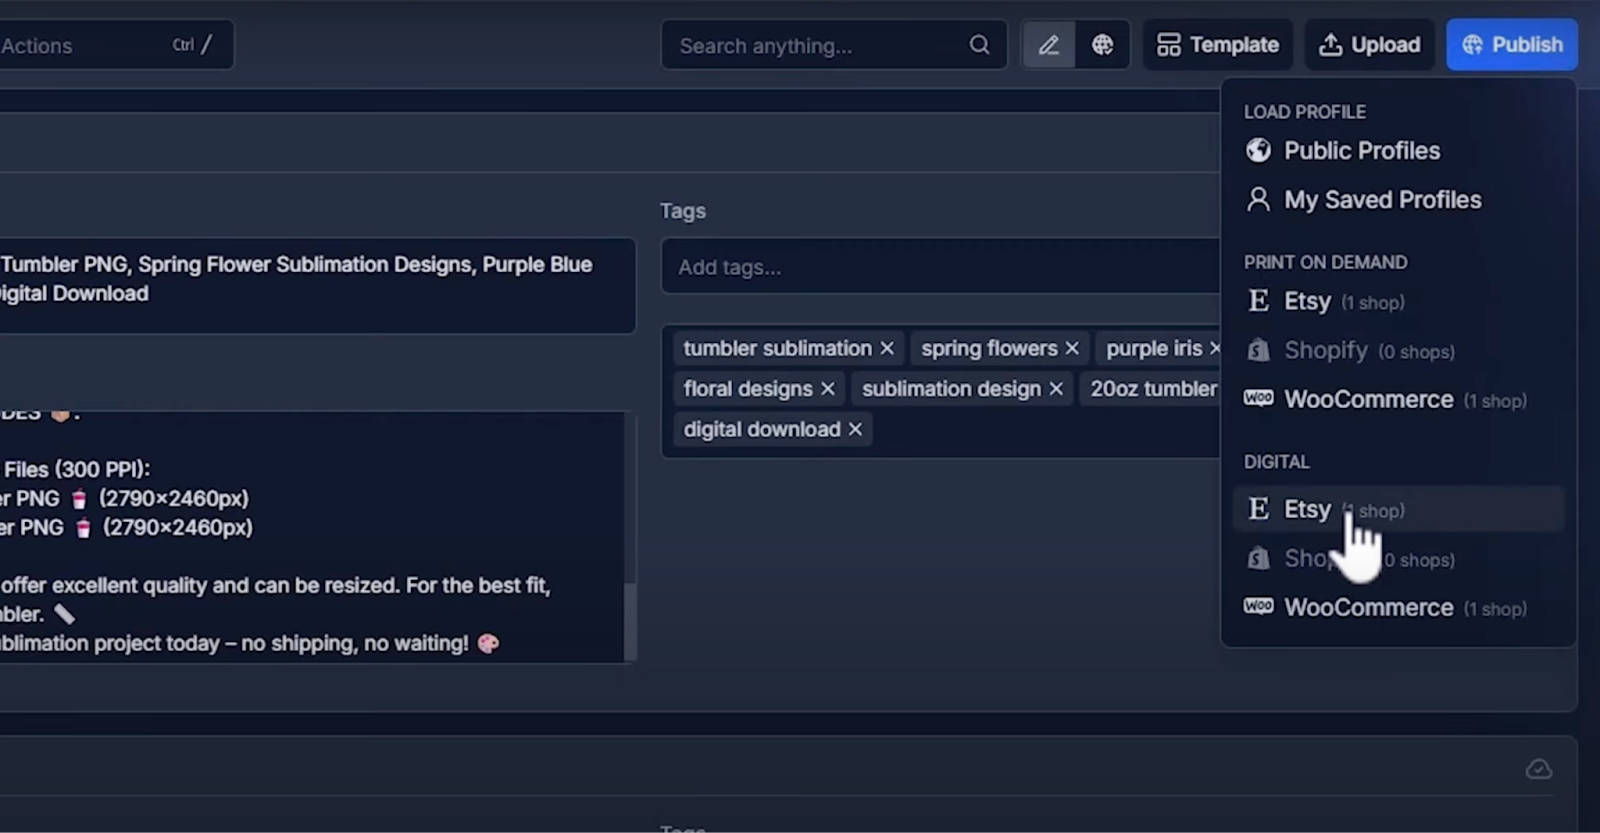
Generating mockups with MyDesigns is super simple, but for tumbler wraps, I’ve made the process as easy as a couple of clicks! Here’s all you need to do. Go back to the Listings page, select all listings you’ve just edited and click Mockups → Image Mockups.
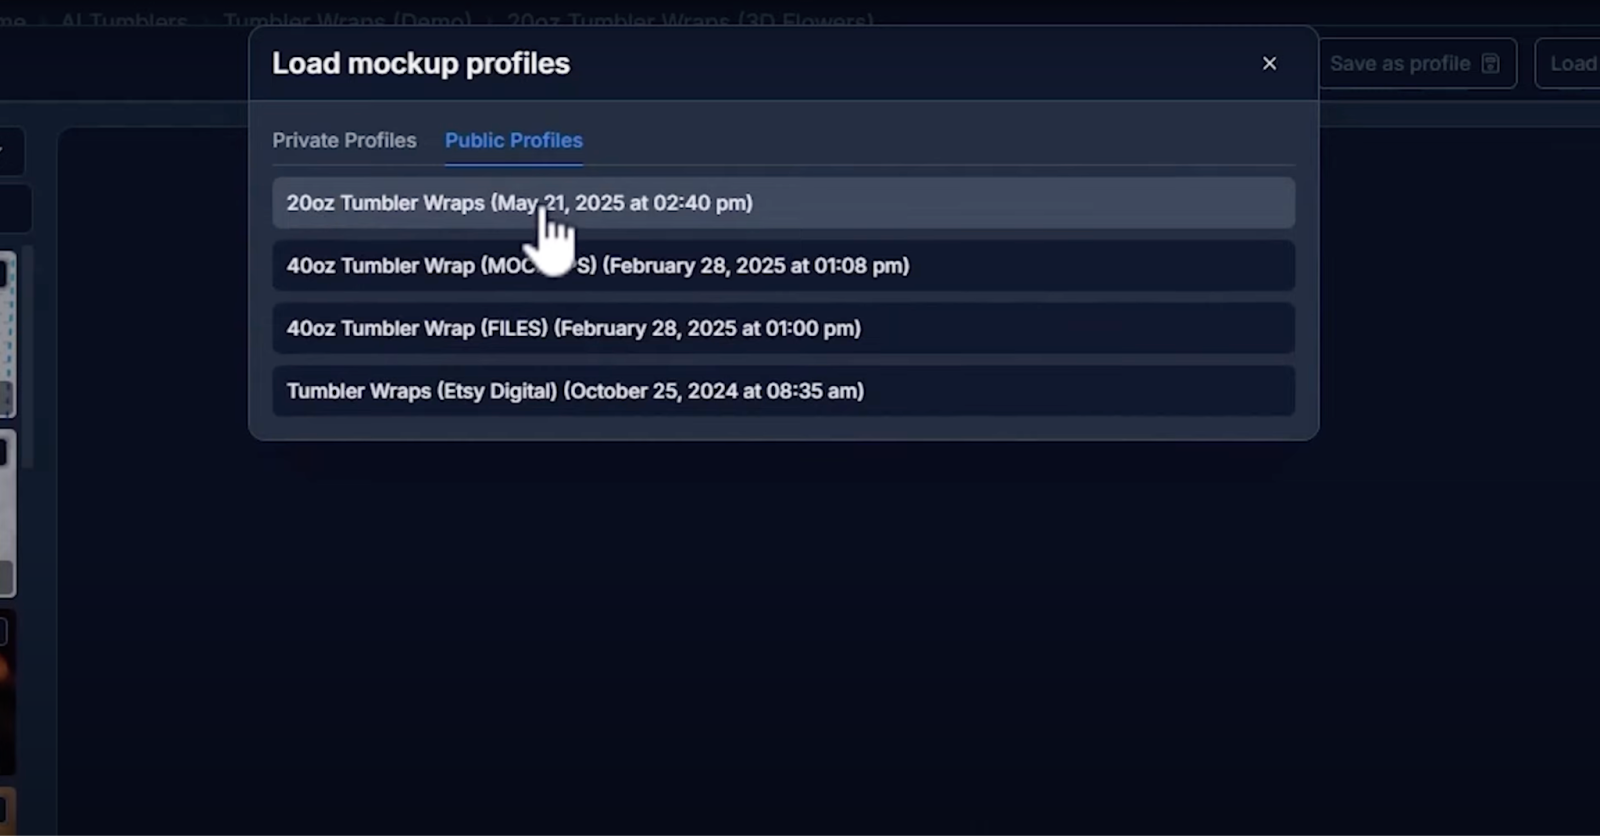
 In the modal that opens, look for the Load profile option in the top-right corner, and switch tabs to Public Profiles. Here, you’ll find a mockup profile I’ve created titled “20oz Tumbler Wraps”.
 This will automatically create all the mockups for you, including tapered files and add them to the right slots automatically for all listings!
Next, let’s generate a video mockup. Select all listings on the Listings page, click Mockups → Video Mockups. You’ll be asked to select image slots in order to generate the video mockup. Simply choose all except Straight and Tapered, and you’re good to go.
Once your video mockups are created, your listing is almost ready to be published!
Related Read: Designing High-Converting Digital Product Mockups
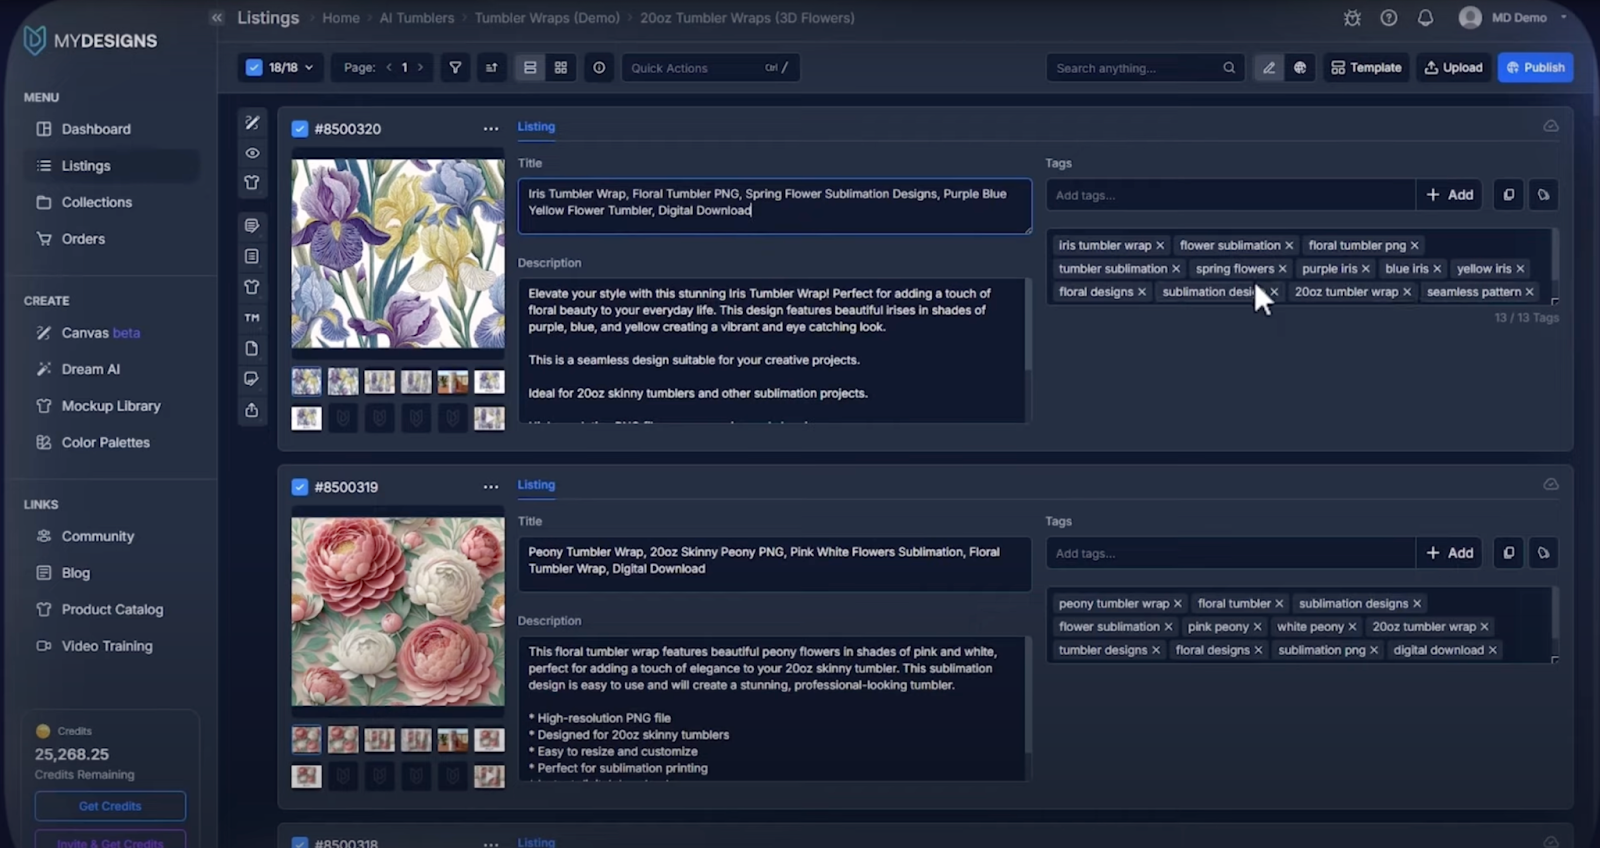
At this stage, all the creative work is done – congratulations! Now we turn those assets into an Etsy product listing, and MyDesigns makes this part incredibly streamlined. Our tool Vision AI helps you generate SEO-friendly titles, descriptions, and tags by analyzing your design. You can even add custom instructions for Vision AI.
Below are the custom instructions I used in the video:
“Analyze my design and generate similar Title and Tags as the examples below. However, make sure you adjust the keywords to reflect what’s on the design itself more accurately.
Example Title:
Rose Tumbler Wrap, 20oz Skinny Rose Tumbler PNG, Spring Flowers Sublimation Designs, Flower Tumbler Wrap, Digital Download
Example Tags:
Rose Tumbler Wrap, Sublimation Designs, Commercial Use, Sublimation Graphics, Watercolor, Tumbler Wraps, Sublimation Tumbler Wrap Designs, Template, 20oz Tumbler Wrap, Floral Tumbler Wrap, Flower designs, Flower Sublimation, Spring Tumblers”
Once you’re satisfied with the instructions, click Run Vision AI and watch Vision AI quickly create SEO-friendly titles, tags and descriptions for all your listings.
 You can also add your own words in titles and descriptions for all your listings at once. For example, I want to add a specific block of text to all these listings to make them more SEO friendly and eye-catching. To do that, simply click the Quick Actions option on top of the Listings page. In the menu that opens, select Edit in Bulk.
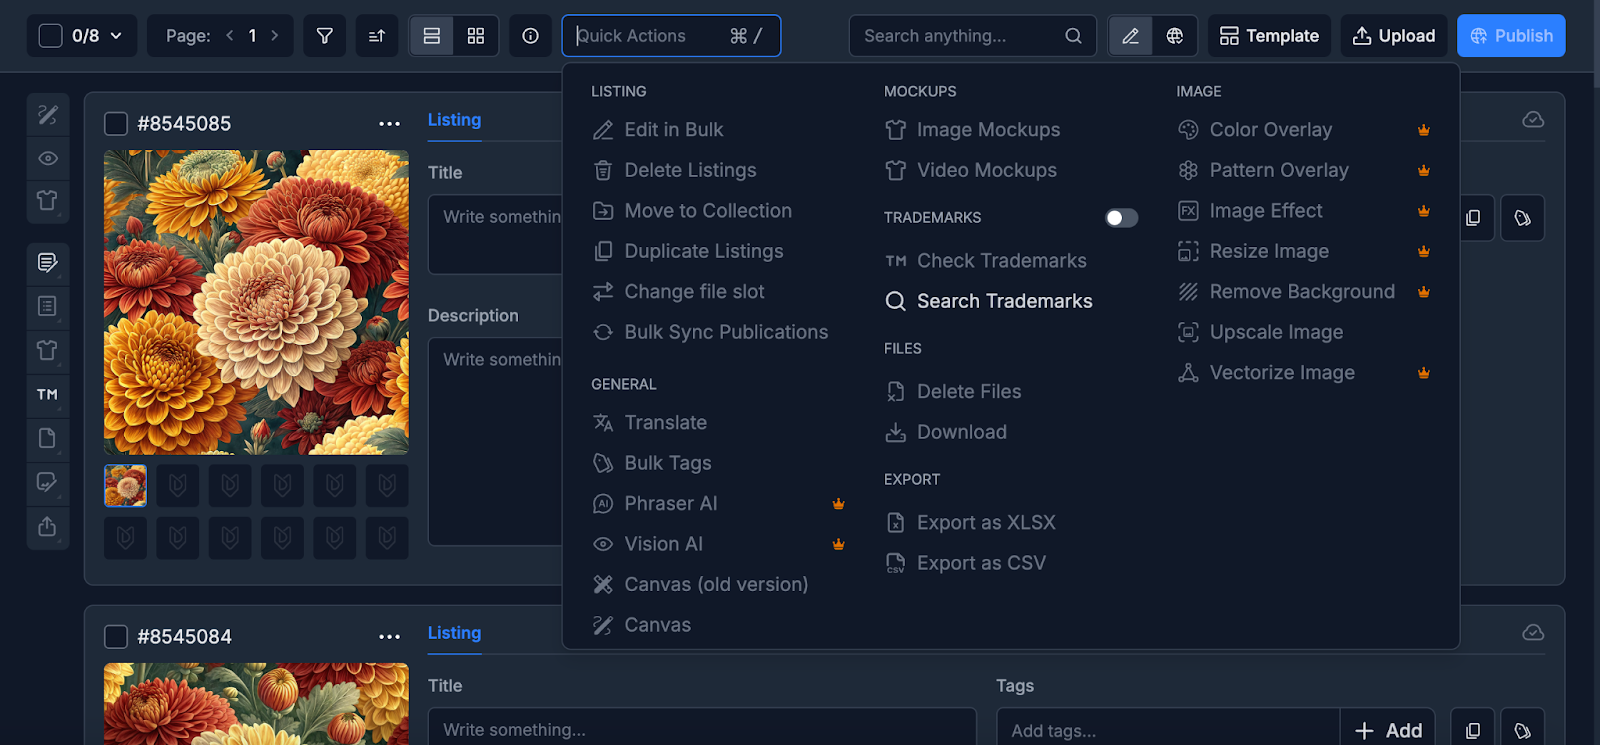 Here, you can choose the field you want to edit. In this case, I want to edit the description of all selected listings by adding extra text, so I’ll choose Description. In this example, I added the following description:
“Instant Digital Download 20oz Tumbler Wraps! 🔗
After purchase, you’ll receive a PDF containing your download link.
PLEASE NOTE: This is a DIGITAL PRODUCT ONLY. No physical item will be shipped. Due to the digital nature, refunds are not available.
YOUR PURCHASE INCLUDES 📦:
- 2 High-Resolution PNG Files (300 PPI):
- 1 Straight 20 oz Tumbler PNG 🥤 (2790x2460px)
- 1 Tapered 20 oz Tumbler PNG 🥤 (2790x2460px)
These 300 PPI PNG files offer excellent quality and can be resized. For the best fit, please measure your tumbler. 📏
Start your DIY tumbler sublimation project today – no shipping, no waiting! 🎨”
Moment of truth – time to get our product on Etsy!
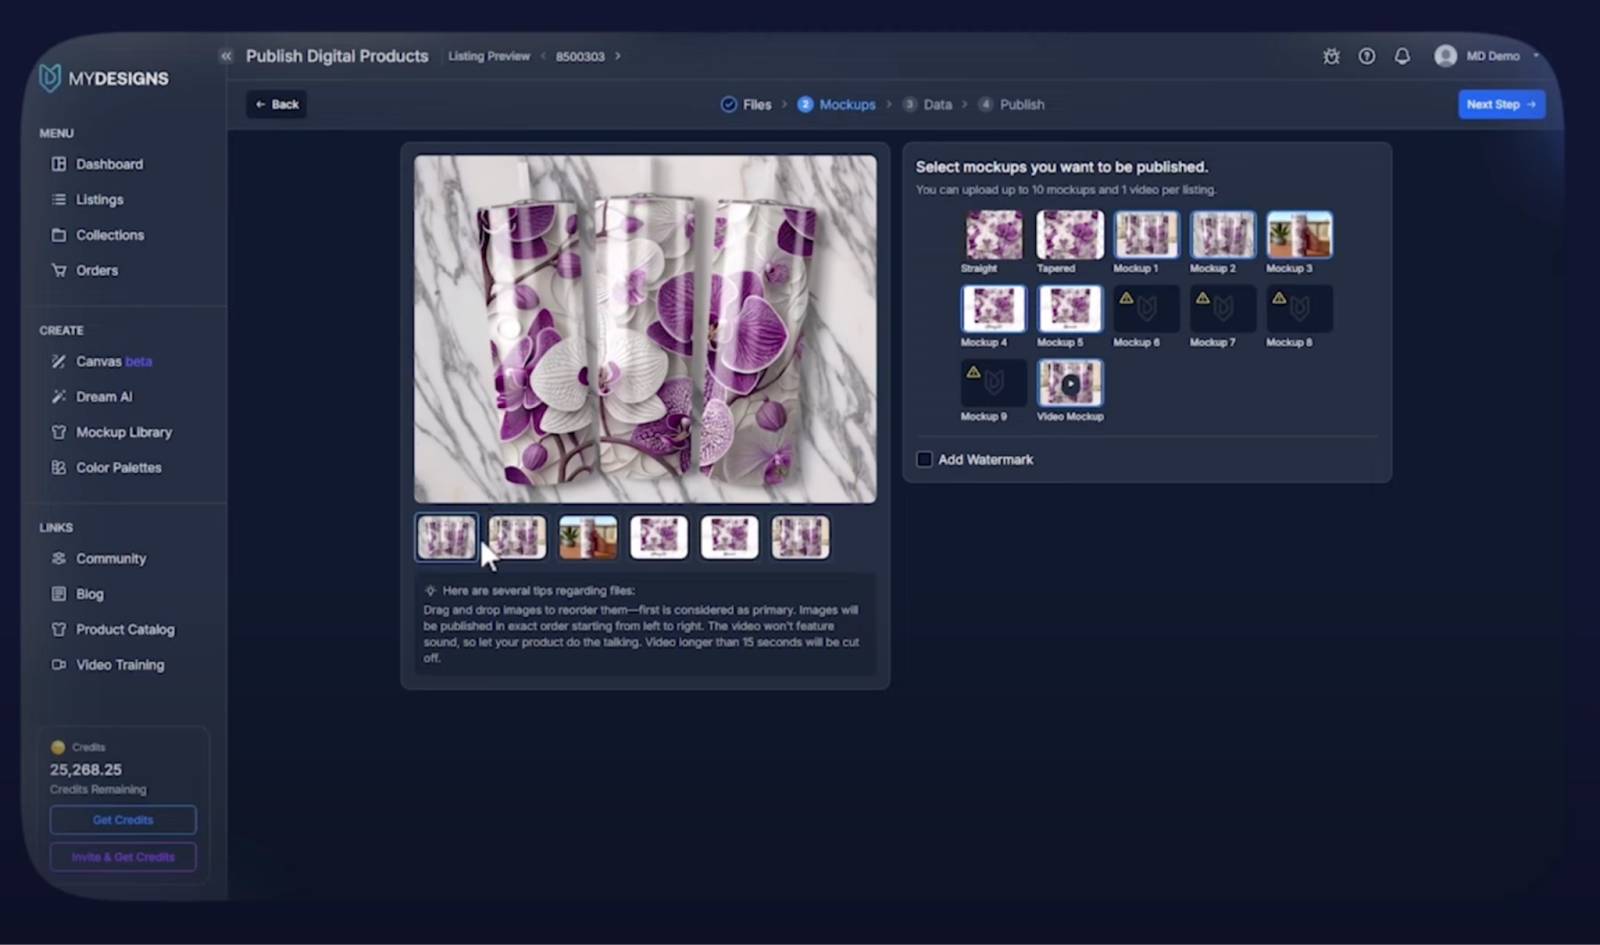
With all your listings selected, hit Publish → Digital → Etsy.
 Next step is to select the files that we’re selling, i.e. the Straight and Tapered file.
Next, choose the mockup images from the list.
 As the final step, select the price and quantity, and that’s it!
Preview all info and hit Publish. Now the listing is active in your Etsy shop, ready for customers to find and purchase!


Leave a Reply