Ready to bring your ideas to life with AI? Let’s dive into Dream AI and generate some awesome designs step by step:
Step 1: Access Dream AI on MyDesigns
First, log in to your MyDesigns account (or sign up if you’re new). Navigate to Dream AI from the left menu. This will open the Dream AI interface, where all the design magic happens.
Step 2: Select an AI Generation Model
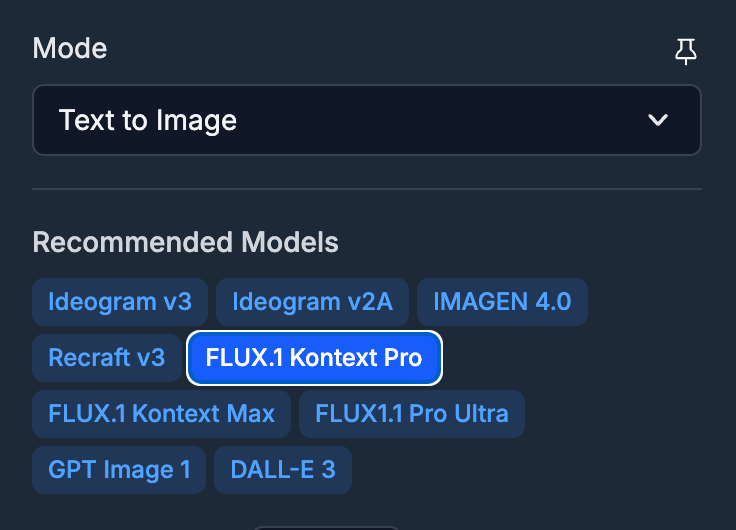 Dream AI gives you a variety of AI image models to choose from. Each model has its own strengths, so pick one that fits your project. Here are some highlights of the models available:
- FLUX.1 Kontext Pro: A next-generation model from Black Forest Labs (the creators of Stable Diffusion). Flux Kontext can not only generate stunning images with realism, but also allows advanced editing and iterations using text and reference images. It’s perfect if you plan to refine the design in steps or need ultra-realistic results.
- Ideogram v3: The latest Ideogram model specializes in images with text. Unlike many AI generators, Ideogram can produce legible, stylish text within your images (think t-shirt slogans, quotes on a poster, product labels, etc.). If your design needs to include written words or typography, Ideogram 3 is your go-to for clean results.
- Google Imagen 4: Imagen 4 delivers visuals that pop with richer details and higher resolution. This model can go up to 2K resolution, producing print-ready images with remarkable clarity in fine details (like textures or water reflections) and even supports prompts in multiple languages. It’s a fantastic choice for when you need big, beautiful images or a specific art style without heavy prompt engineering.
- OpenAI GPT Image 1: OpenAI’s powerful new multimodal model (essentially the tech behind DALL·E 3) is also at your fingertips. GPT Image 1 excels at understanding complex or nuanced instructions and has excellent instruction-following and context from real-world knowledge. It’s great for highly detailed scenes or when you want the AI to incorporate factual elements.
And that’s not all – Dream AI also includes other popular models like DALL·E 3, Stable Diffusion XL (SDXL), SD3 Turbo, and Recraft v3 for image upscaling/enhancement. Check out our guide on image generation models supported by Dream AI.
Don’t be afraid to experiment. For your first run, pick a model that matches your design idea (for example, try Ideogram 3 for a text-heavy t-shirt design, or Imagen 4 for a photorealistic scene). You can always switch models and regenerate to compare results.
Step 3: Customize Your Settings
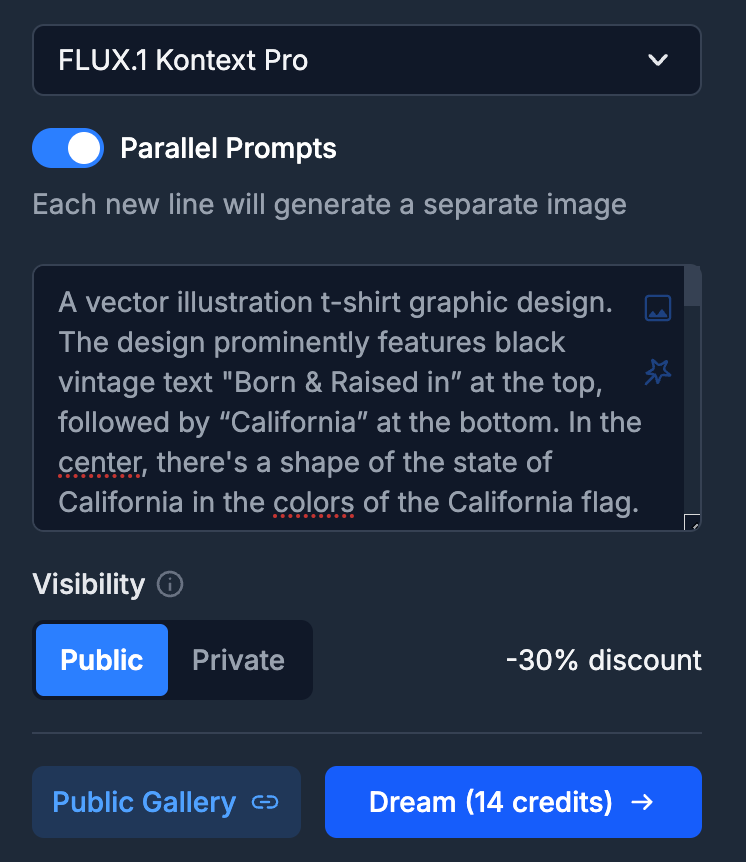
 The Dream AI interface lets you fine-tune a few settings before you generate. For instance, you can choose how many images to create per prompt (do you want just one output, or 4, or 10?). You can also set the aspect ratio or resolution for your images – for example, 1:1 square (great for t-shirts and social posts) or a 2:3 portrait, etc., up to high-res outputs.
There are even style presets and advanced options for certain models (like art styles or lighting effects) if you want to get fancy. Take a moment to adjust these settings according to your needs.
Notice in the interface you have the option to make your generation Private or Public. If you choose Public, your prompt and resulting image will be shared in the public Dream gallery – and you’ll save 30% on your AI credits for this generation as a thank you for contributing!
Step 4: Create Your Prompt
Before you create your own prompt, I recommend taking a moment to explore the dream library I mentioned in the previous step. This gallery showcases a growing library of AI-generated designs and prompts shared by the MyDesigns community. Scanning through others’ creations is a great way to spark inspiration for your own projects.
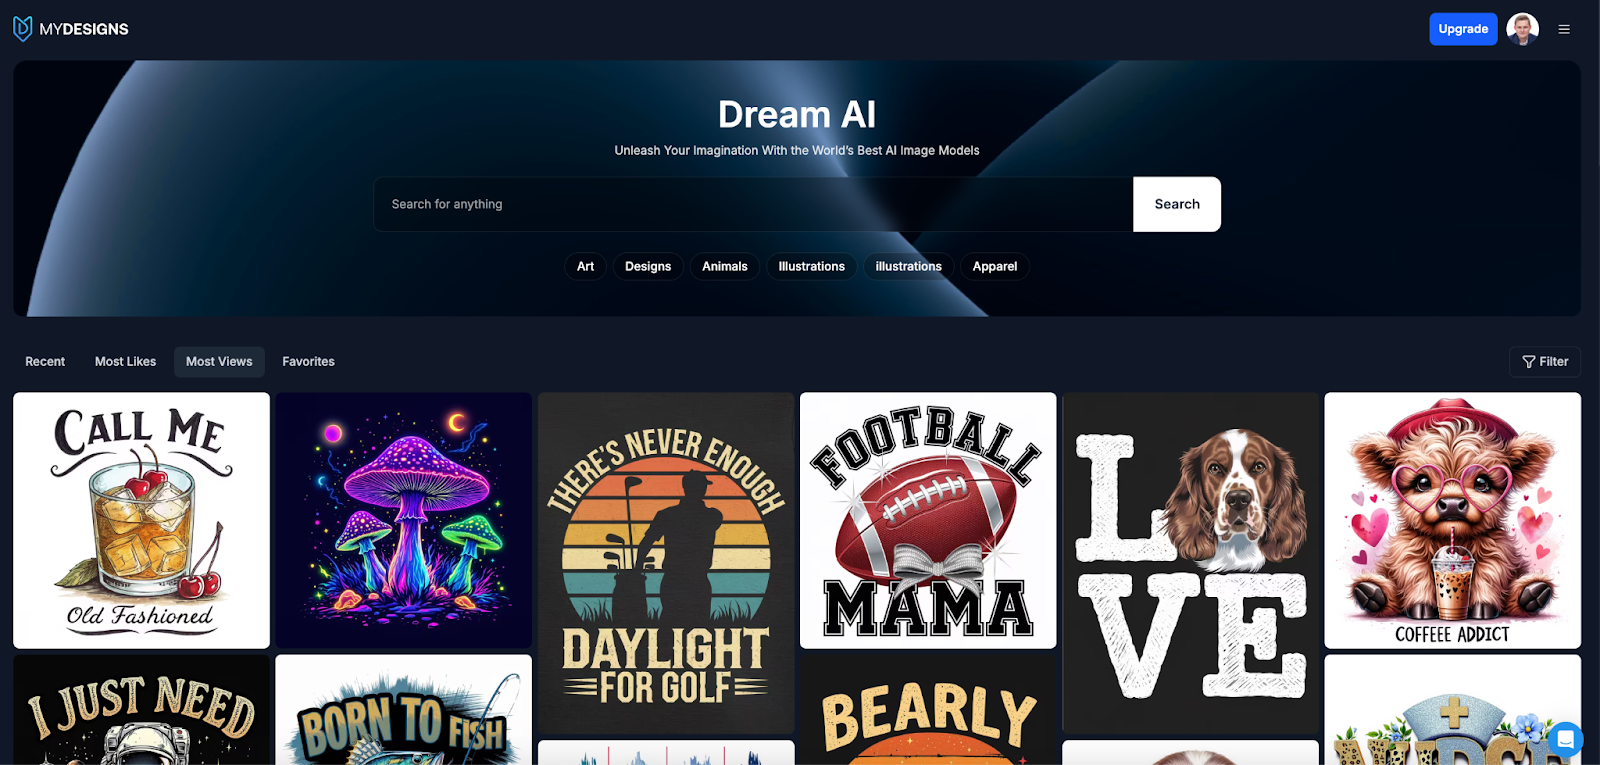
See a cool design? You can often view the prompt that generated it and even reuse or tweak it for your needs.
Now it’s time to create your own prompt. Write a clear text prompt describing the image or artwork you want. Be as descriptive as you can: include the subject and any style or mood keywords to guide the AI. For example, you might type “a vintage retro-style logo of a sunset over mountains” or “cute watercolor illustration of a cat wearing sunglasses”.
You don’t need complex jargon. Just describe your idea as if you’re painting a picture with words. Dream AI will handle the rest.
For this tutorial, we’ll go with “A vector illustration t-shirt graphic design. The design prominently features black vintage text “Born & Raised in” at the top, followed by “Arizona” at the bottom. In the center, there’s a shape of the state of Arizona in the colors of the Arizona flag. Isolated on a white background.”
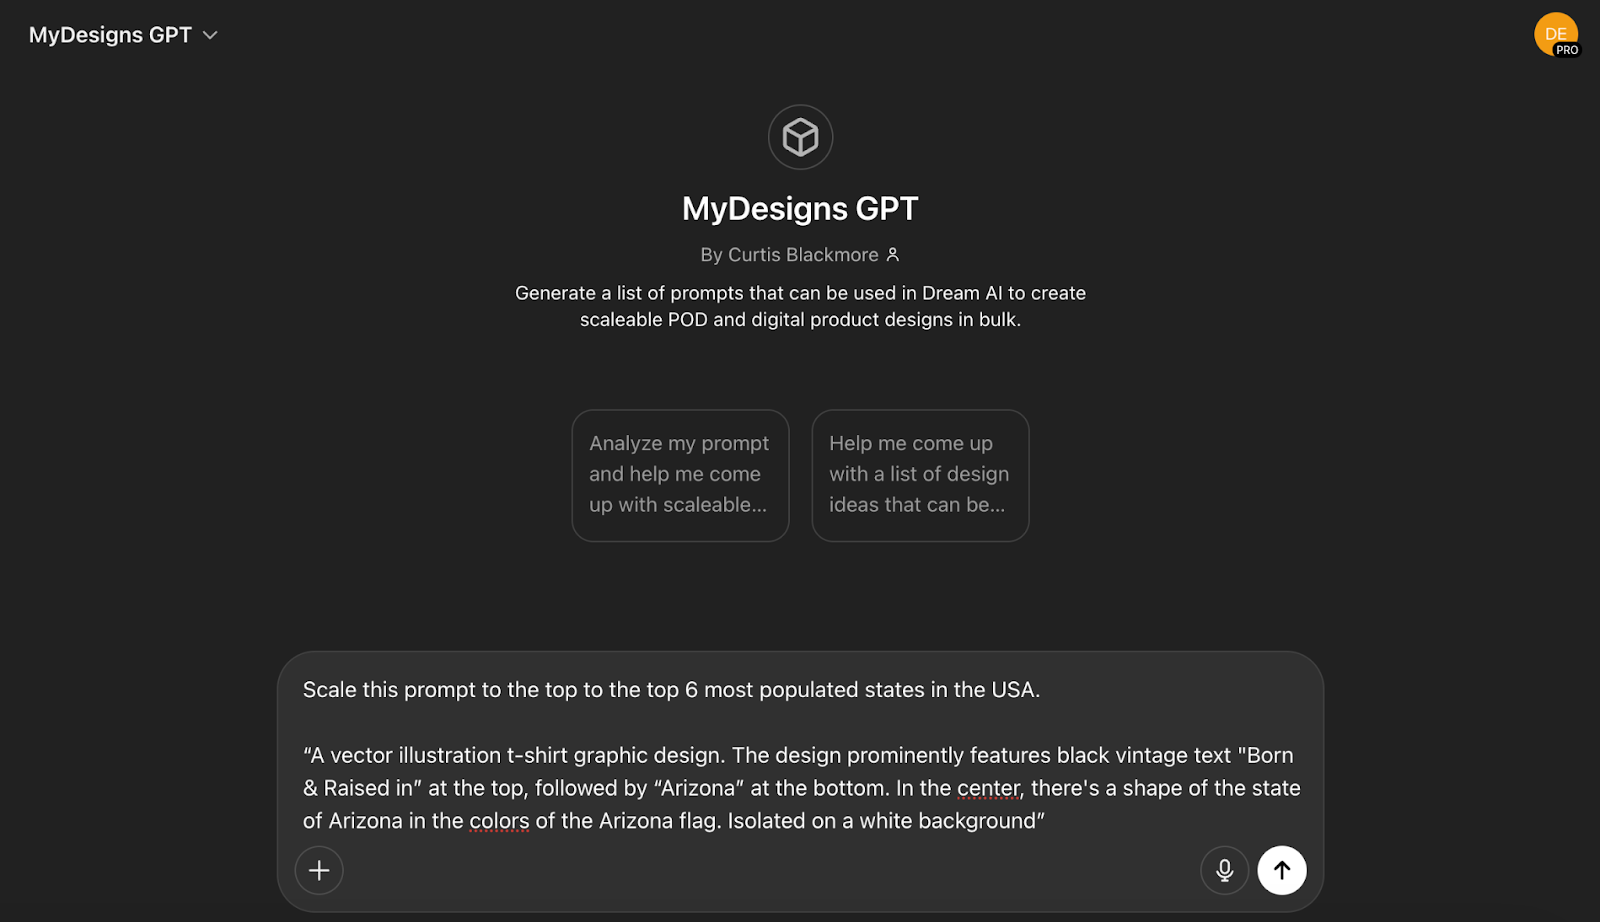
Step 5: Scale Up Your Designs with MyDesigns GPT (Coming Soon!)
Since this tutorial is meant to show you how to generate a large number of designs, I thought to mention this step where you can scale up your prompting easily with MyDesigns GPT. We’ll be releasing it very soon in Dream AI!
This custom AI helper will automatically generate multiple prompt variations based on your input idea. In other words, you’ll be able to enter one prompt, and the MyDesigns GPT will brainstorm and create a list of tweaked prompts or related ideas for you. You can then batch-generate a ton of designs at once! This is perfect for quickly expanding a concept into a full collection (for example, generating a series of quotes with different themes, or a set of graphics in various styles).
For example, for this tutorial, I started with the prompt “A vector illustration t-shirt graphic design. The design prominently features black vintage text “Born & Raised in” at the top, followed by “Arizona” at the bottom. In the center, there’s a shape of the state of Arizona in the colors of the Arizona flag. Isolated on a white background” and asked MyDesigns GPT to generate variants of this prompt for the top 6 most populated states in the USA.
 I then pasted the output in the prompt field in Dream AI. When doing this, make sure there’s a line spacing separating each prompt so MyDesigns can understand that these are different prompts. Also make sure you toggle on the Parallel Prompts option.
 Step 6: Generate Your Designs
Now for the fun part – let’s generate! Double-check your prompt, selected model, and settings, then hit that Dream button to unleash the AI. Dream AI will now work its magic using the model you chose. In just moments, you’ll see your new design(s) appear on the screen. If you requested multiple images, they’ll all pop up as a grid of variants. It’s almost like watching your idea come to life out of thin air, right before your eyes!
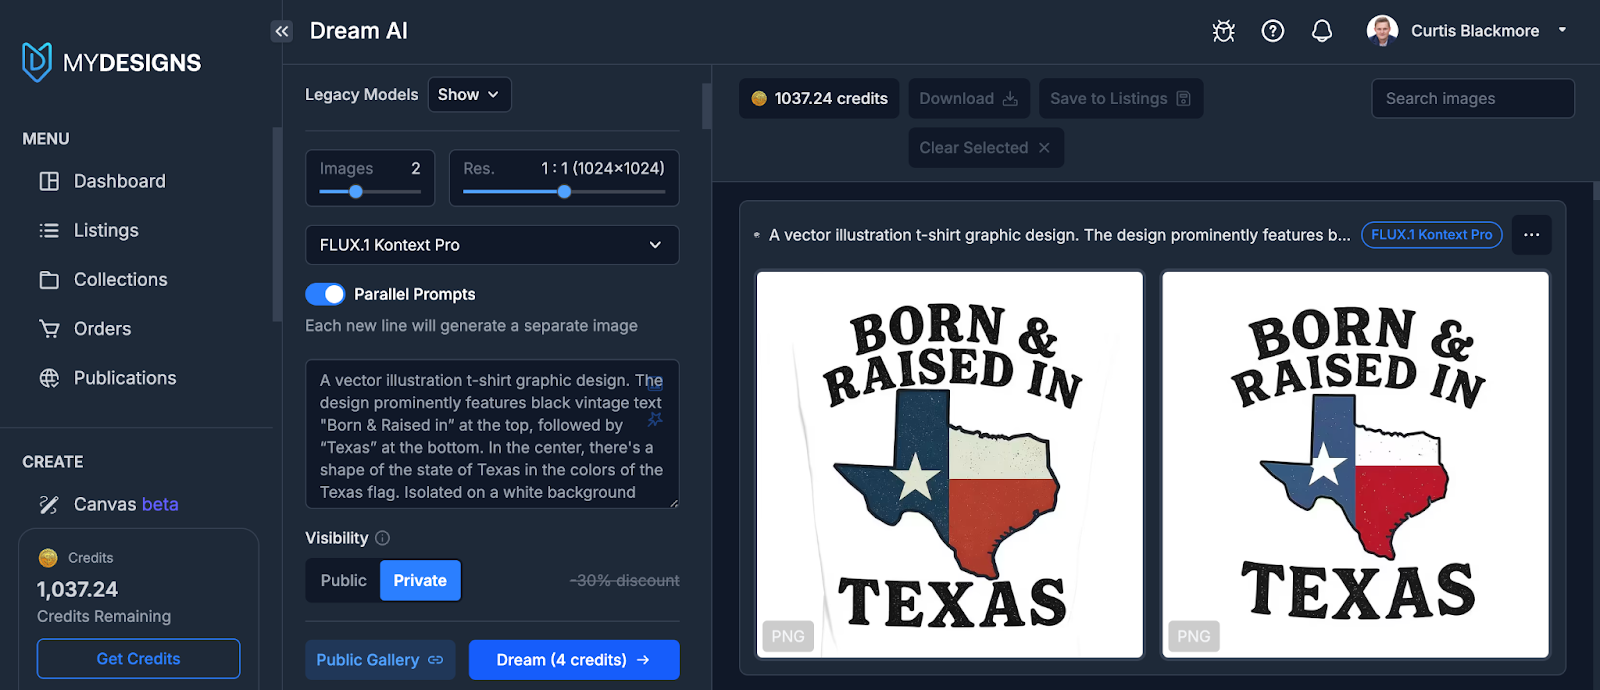 Take a look at each generated image and see how the AI interpreted your prompt. This is the moment where your textual idea turns into visual reality!
Step 7: Review and Refine Your Results
Once Dream AI has produced your images, it’s time to review them. Do the results match your vision? Often, the AI will give you a few pleasant surprises or creative interpretations. Pick out the best designs that you love. If one of the images is spot on, awesome! If not, no worries, this is an iterative creative process. You can refine your prompt or try a different model and generate again. For example, you might add more detail to the prompt (“add golden ornate borders” or “in a cartoon style”) or switch to another model to see if it gives a style you prefer. Dream AI makes it super quick to tweak and re-run prompts, so you can hone in on the perfect design in a few rounds.
Step 8: Take Your Best Designs into Listing Management
After generating all these wonderful designs, the next step is to put them to work for you. you have the option to download the designs as zip, by toggling on “Download as Zip” and clicking “Download”. You can also save the designs for your listings page.
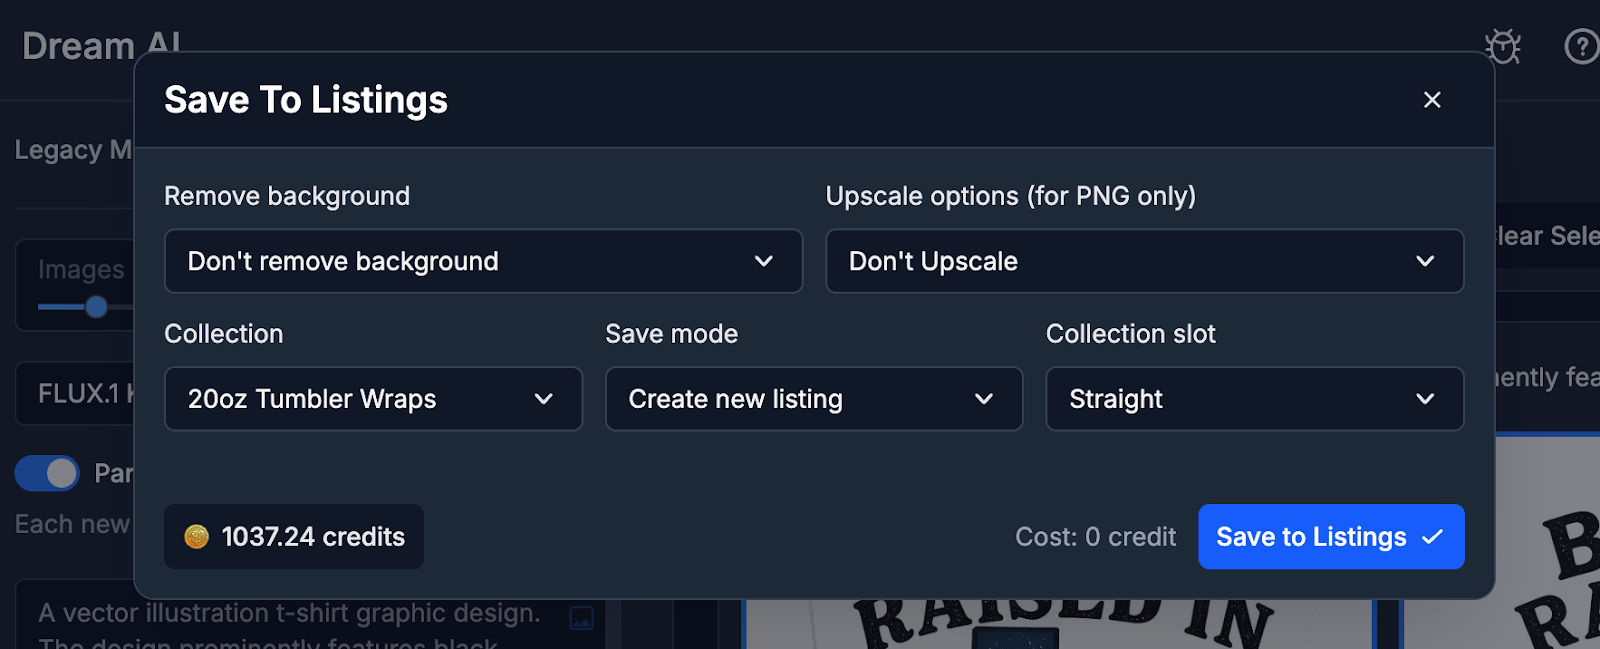 Once saved, head over to the Listing Management section of MyDesigns. Here you can prepare your listings for sale. MyDesigns’ listing management tool streamlines the process of making edits to the design, generating mockups and SEO data (titles, tags and descriptions) all in bulk! That means you can take, say, your top 20 AI-generated designs and rapidly create 20 product listings on Etsy, Amazon, or other integrated shops with just a few clicks – no manual uploading one by one.
Step 9: Publish Your Listings and Start Making Profits
Once you’re satisfied with your listings, hit Publish. Review all listings one final time and finish the publishing steps. In no time, your AI-born designs will be live in your store, ready to bring in sales!
This end-to-end flow from idea to AI design to marketplace listing can all happen inside MyDesigns, which is pretty darn cool for productivity if you ask us!


Leave a Reply