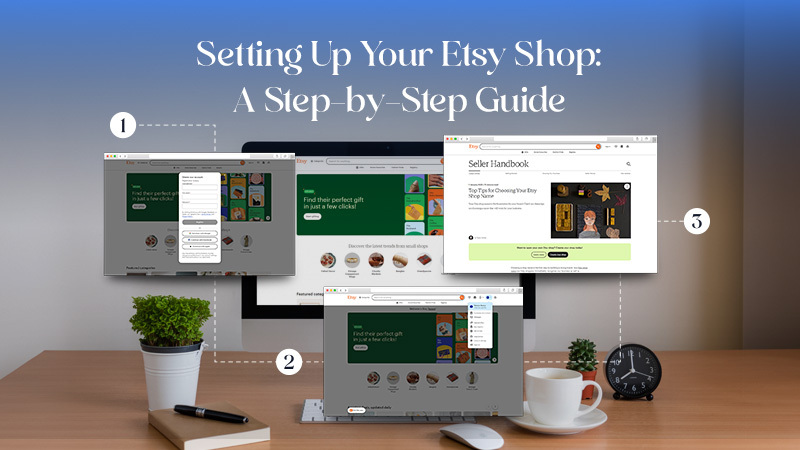
In the previous article, we explored how to pick a profitable niche for your Etsy shop. Now that you’ve identified your niche, it’s time to move on to the next crucial step: setting up your Etsy shop. This process may seem daunting at first, but with a clear step-by-step guide, you can establish a professional presence that attracts customers and sets the foundation for your success. Let’s dive into the details of each step to ensure you have all the information you need to create a thriving Etsy store.
Table of Contents
Step 1: Create Your Etsy Account
The first step is to create an Etsy account if you haven’t done so already. Once you’ve created your account, simply go to the Etsy website and click on “Sell on Etsy” at the top right of the page.

You’ll need to provide some basic information, including your name, email address, and a password.
Pro Tip: If you already have a buyer account on Etsy, you can easily switch to a seller account using the same credentials, saving you time and effort.
Step 2: Set Up Your Shop Preferences
Next, you’ll need to select your shop preferences, including the language you’ll use to communicate with customers, your country, and the currency you’ll be using. Make sure to choose options that align with your target audience, as this will enhance your customers’ shopping experience.
Cultural Considerations: If you’re targeting international customers, think about how language and currency preferences may vary. Providing translations or alternative currency options could improve user experience and increase sales.
Step 3: Choose Your Shop Name
Your shop name is your brand’s identity on Etsy. Choose a name that reflects your niche and is easy to remember. Keep in mind that Etsy has some guidelines: your shop name must be unique, can’t exceed 20 characters, and can’t contain spaces or special characters. Once you find a name you love, you can check its availability and claim it.
Brainstorming Tips:
- Think about keywords related to your niche.
- Consider using a combination of words that describe your products.
- Test the name with friends or potential customers to gauge their reactions.
Check out Etsy’s guidelines on choosing shop name.
Step 4: Add Your Listings
This is where the fun begins! Start adding your products by clicking on “Add a listing.” Here, you’ll upload high-quality images of your products, write compelling descriptions, and set your prices.
At this stage, don’t spend too long adding all the listings–you can start with a couple of them and get back to this step later after setting up your shop.
At MyDesigns, our suite of AI and automation tools makes it easy for you to generate listing designs, add conversion-optimized listing data and generate mockups in bulk so you can quickly create conversion-ready listings at scale. We’ll cover these topics in the upcoming articles.
Tips for Great Listings:
- Mockups: Use high quality image and video mockups. Mockups give your buyers a realistic view of how the product will look, and can significantly boost the conversion rate.
- Titles, Tags, and Descriptions: Your titles and tags should be optimized with relevant keywords to improve search visibility.
- Pricing: Research similar products on Etsy to understand the market price range. Additionally, offering tiered pricing for different product variations can encourage buyers to purchase more.
Step 5: Verify Your Identity
Upload your selfie and a photo of your government ID to verify your identity.
Step 6: Add Your Payment Details and Turn On 2FA
You’re almost there! Simply connect your bank account with Etsy so you can start receiving payments once your products get purchased.
Next step is to switch on two-factor authentication to protect your shop.
Step 7: Customize Your Shop’s Look
Your shop’s appearance matters! Customize your shop by adding a logo, banner, and profile picture. These visual elements help create a cohesive brand identity that resonates with customers. Make sure your branding reflects your niche and appeals to your target audience.
Branding Elements to Consider:
- Logo: Create a professional logo that encapsulates your brand’s essence.
- Banner: Design a banner that visually communicates what your shop offers. This is often the first thing customers see when they visit your shop.
- Shop Announcement: Use this space to share any promotions, new product launches, or important updates with your visitors.
Step 8: Launch Your Shop!
Once you’ve completed the above steps, it’s time to launch your shop! Before you go live, double-check everything to ensure that your listings are polished and ready for customers. When you’re confident everything looks great, hit that launch button and start sharing your shop with the world!
Promotion Strategies:
- Share your shop link on social media platforms like Instagram, Pinterest, and Facebook to attract potential buyers.
- Consider joining Etsy teams or online communities where you can promote your shop and connect with other sellers.
Join My Masterclass for More Insights
If you want to dive deeper into successfully setting up and running your Etsy shop, I invite you to join my Masterclass. In this session, I discuss how to pick the right niche and provide a detailed step-by-step guide on turning just 4 hours of work into an Etsy shop generating $10,000 per month in revenue through custom napkin sales. This Masterclass is an excellent resource for gaining practical insights that can help you succeed on Etsy. Sign up for the Masterclass here.
Conclusion
Setting up your Etsy shop is an exciting step toward building your own successful business. With careful planning and attention to detail, you can create an attractive and functional shop that draws in customers. In the next article, we’ll cover how to create eye-catching designs that sell, so stay tuned as we continue this journey together!


Leave a Reply